Functions: Tags
Accessible from the Functions menu, Tags are a helpful tool for admins to group and filter contacts to support various workflows. Tags are configurable which means new tags can be created or removed, and then assigned to contacts individually or in bulk.

Assign Tags
You can assign tags in one of two ways:
- Bulk Assign Tags to multiple contacts
- Assign Tags to a specific contact
Bulk Assign Tags
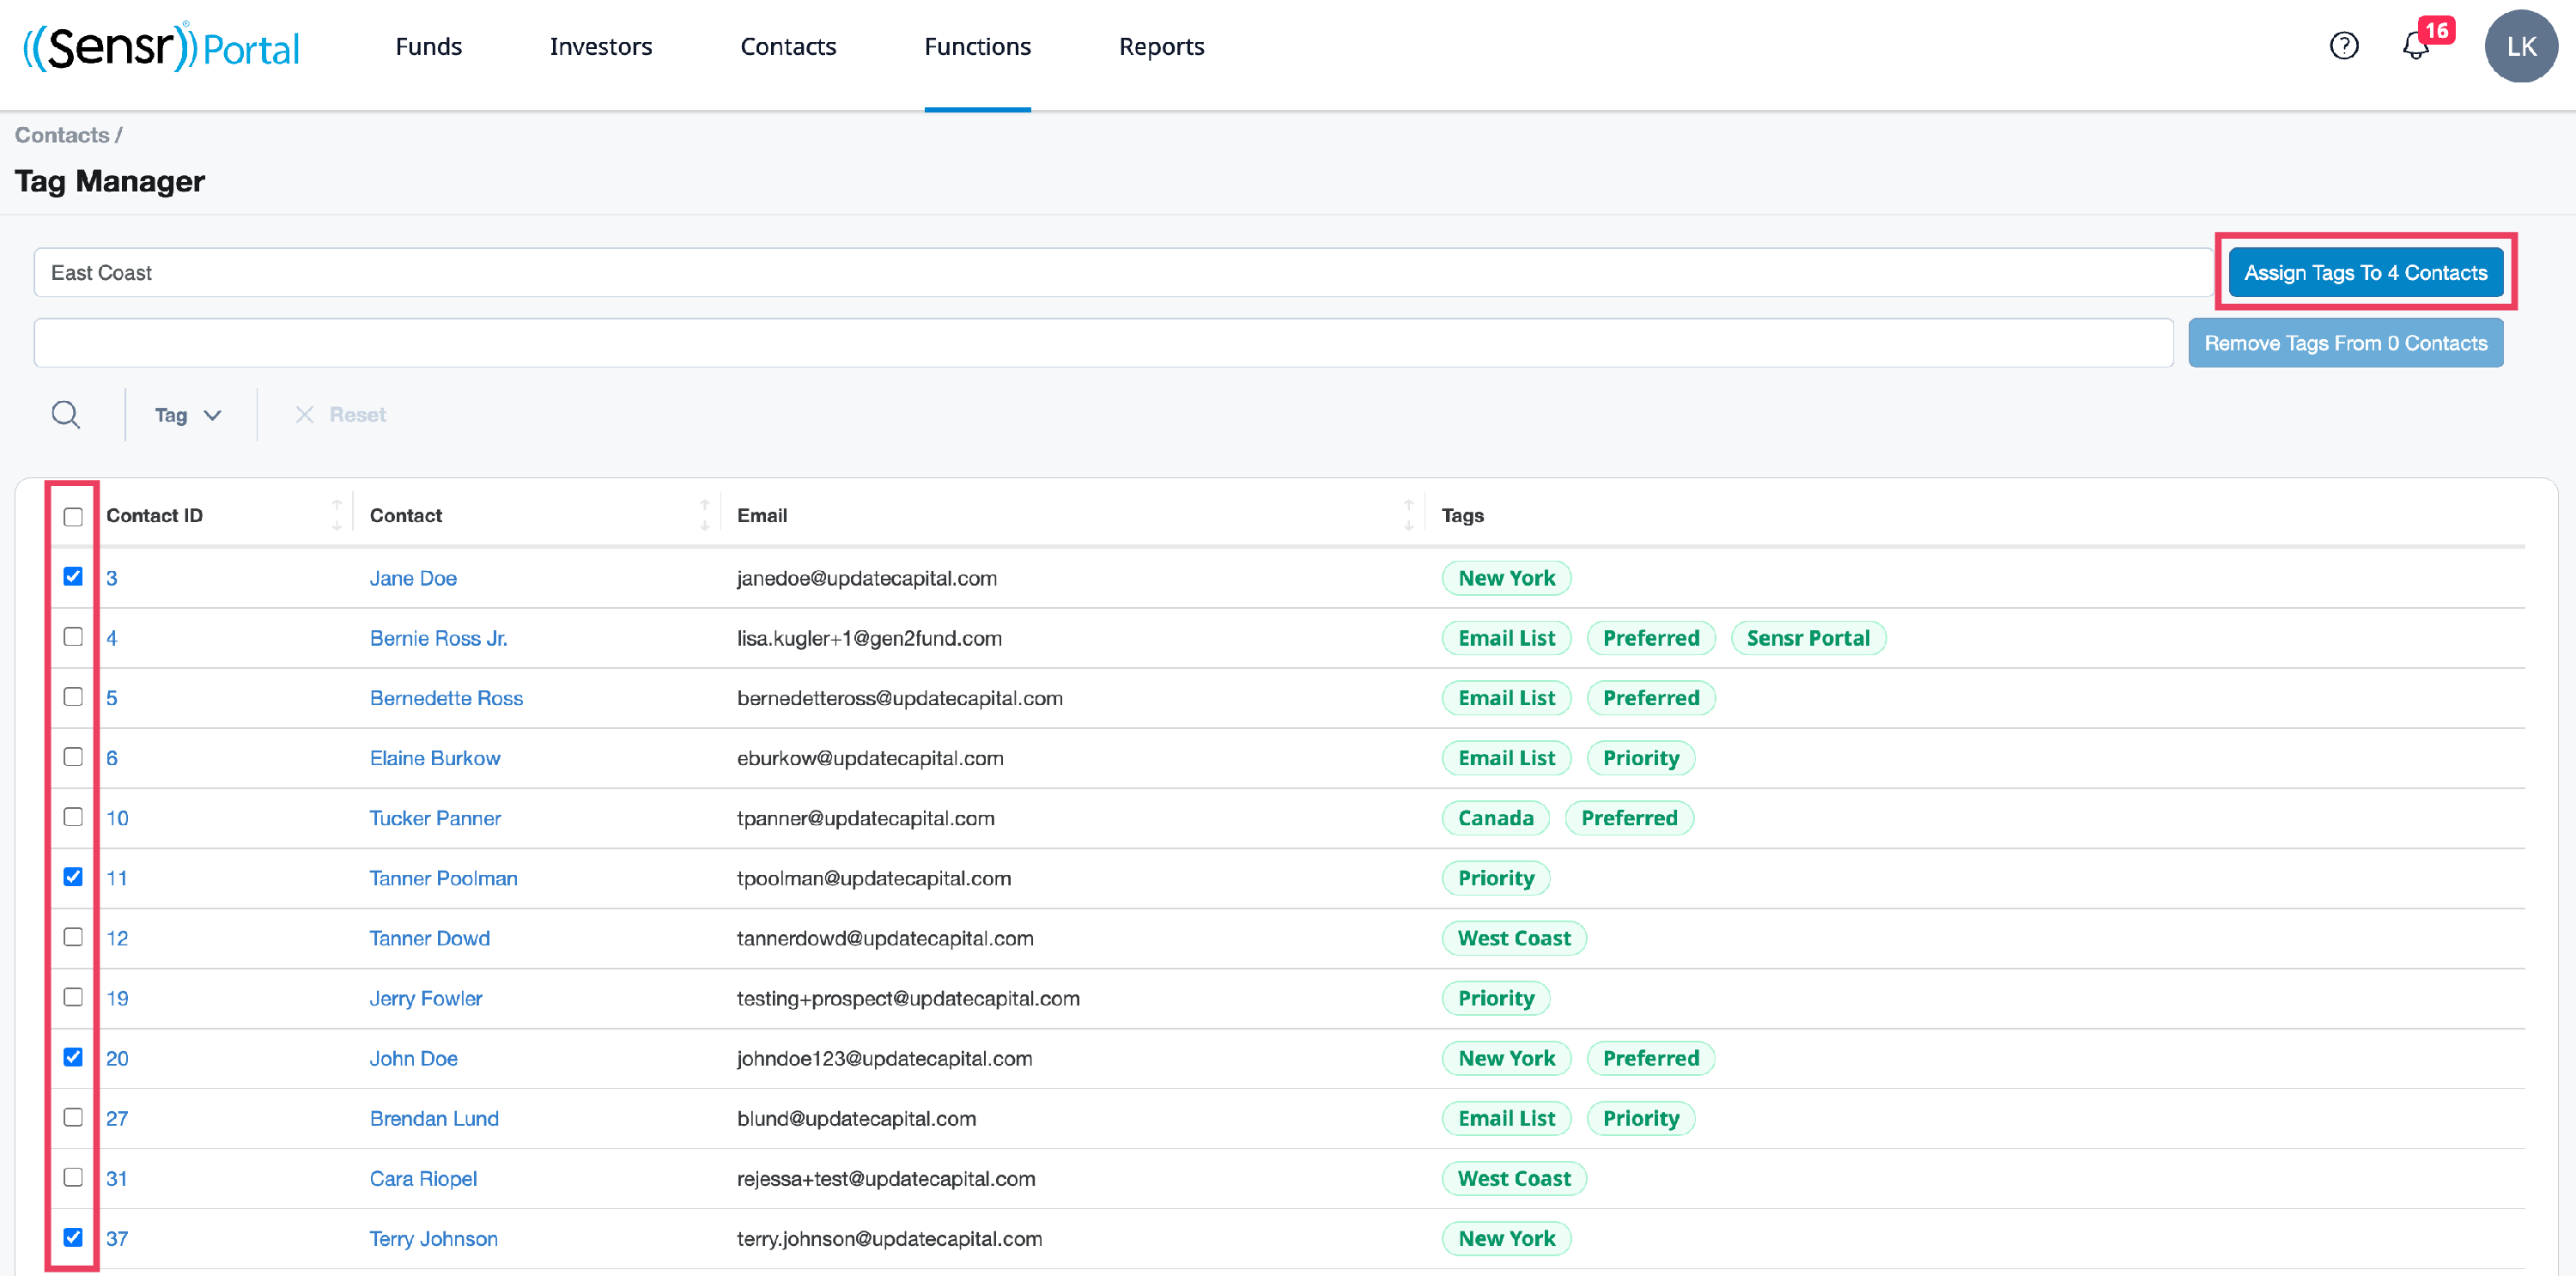
- Navigate to Functions > Tags.
- In the field to the left of the Assign Tags to button enter the tag(s) you would like to add to a group of contacts in the Assign tags to field.
-
Use the checkboxes to select the contact(s) to assign the tag(s). Then click the Assign Tags to Contacts button. Once confirmed, a green banner appears, and the tags(s) are assigned to the selected contacts.

Assign Tags to a specific contact
-
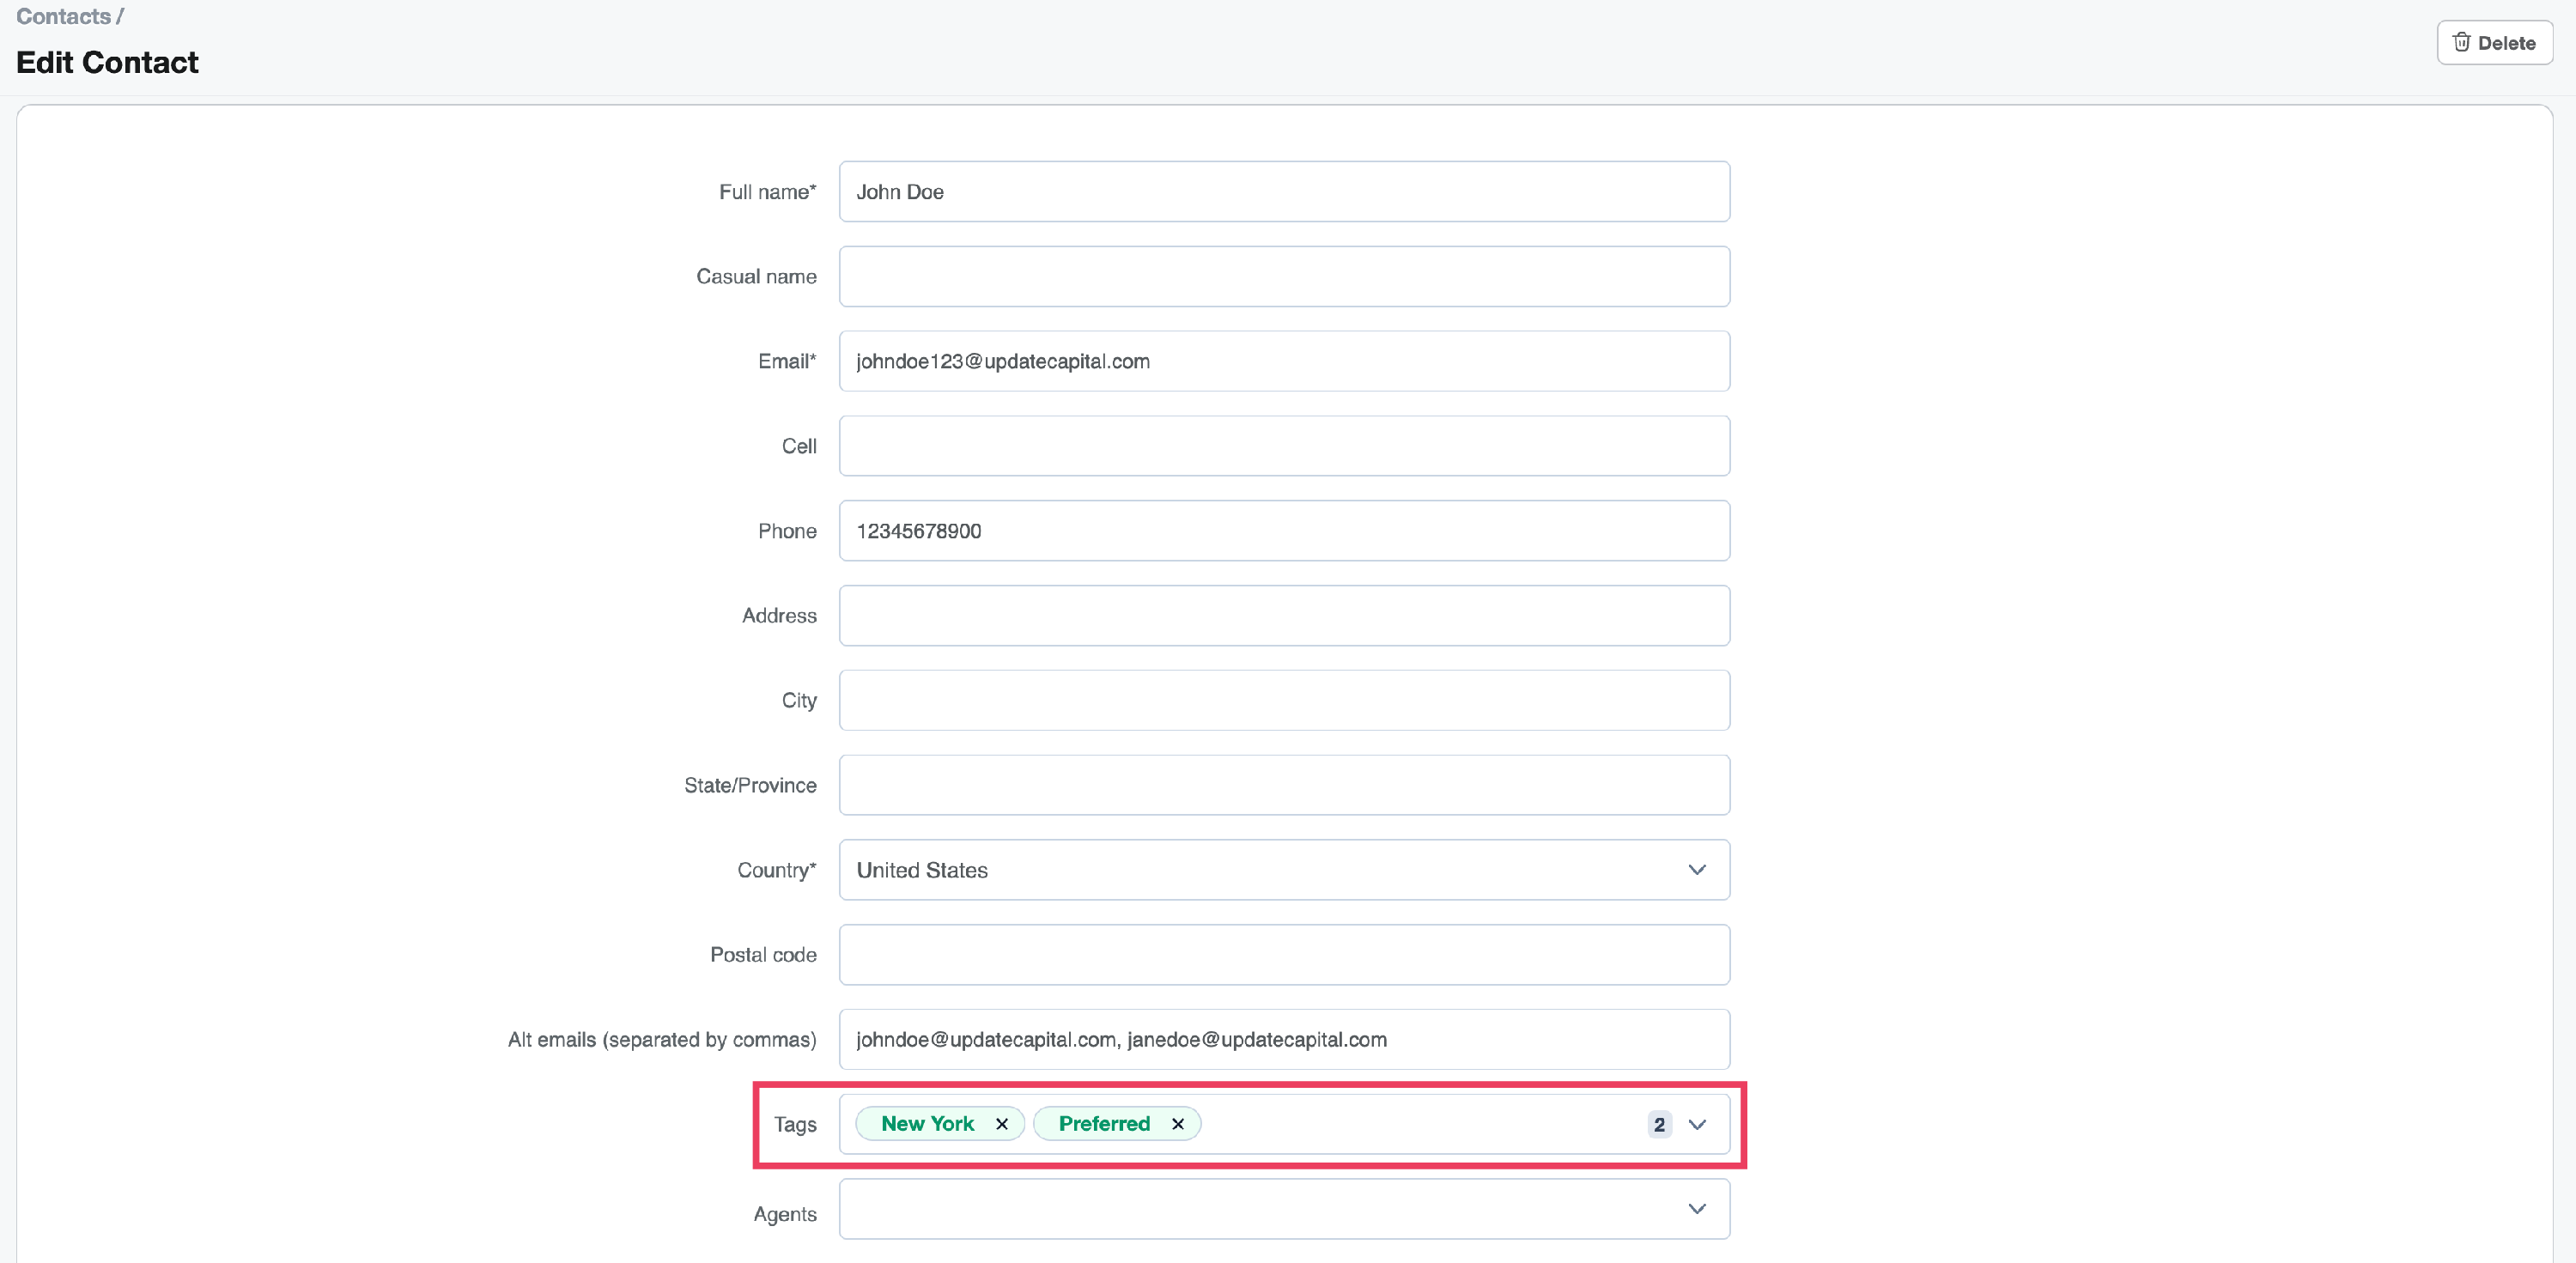
From the Contacts tab in the main menu, select a contact to assign a tag. Click Edit Contact Details.

-
In the Tags menu, use the checkboxes to select tags.
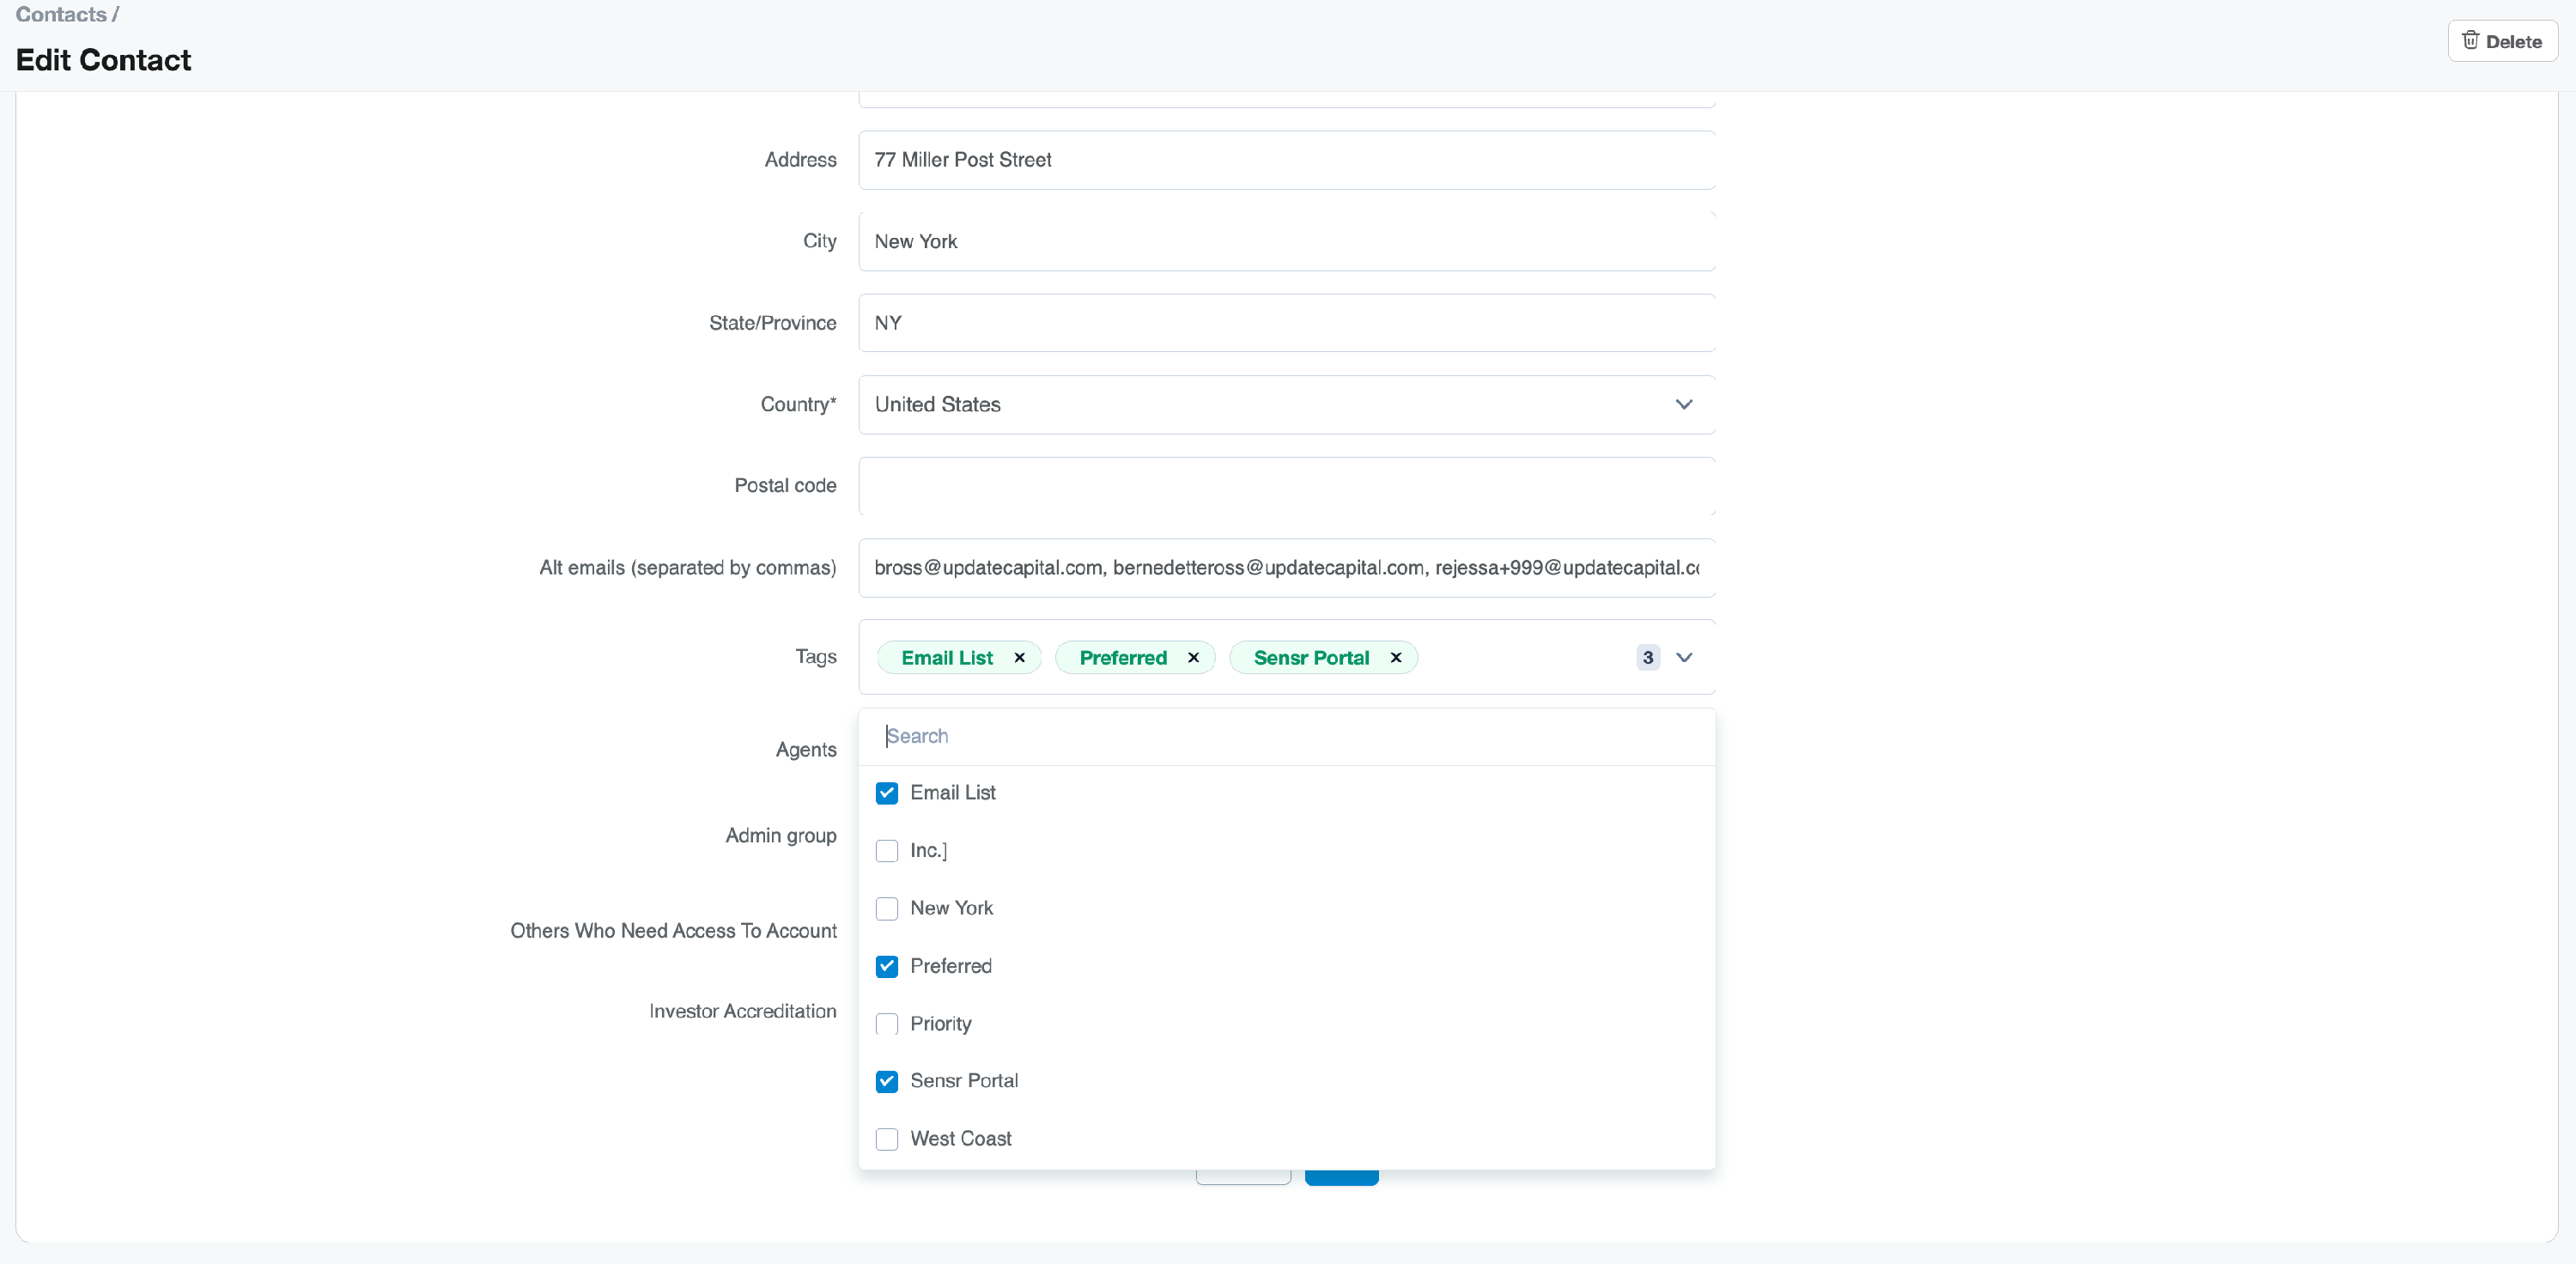
-
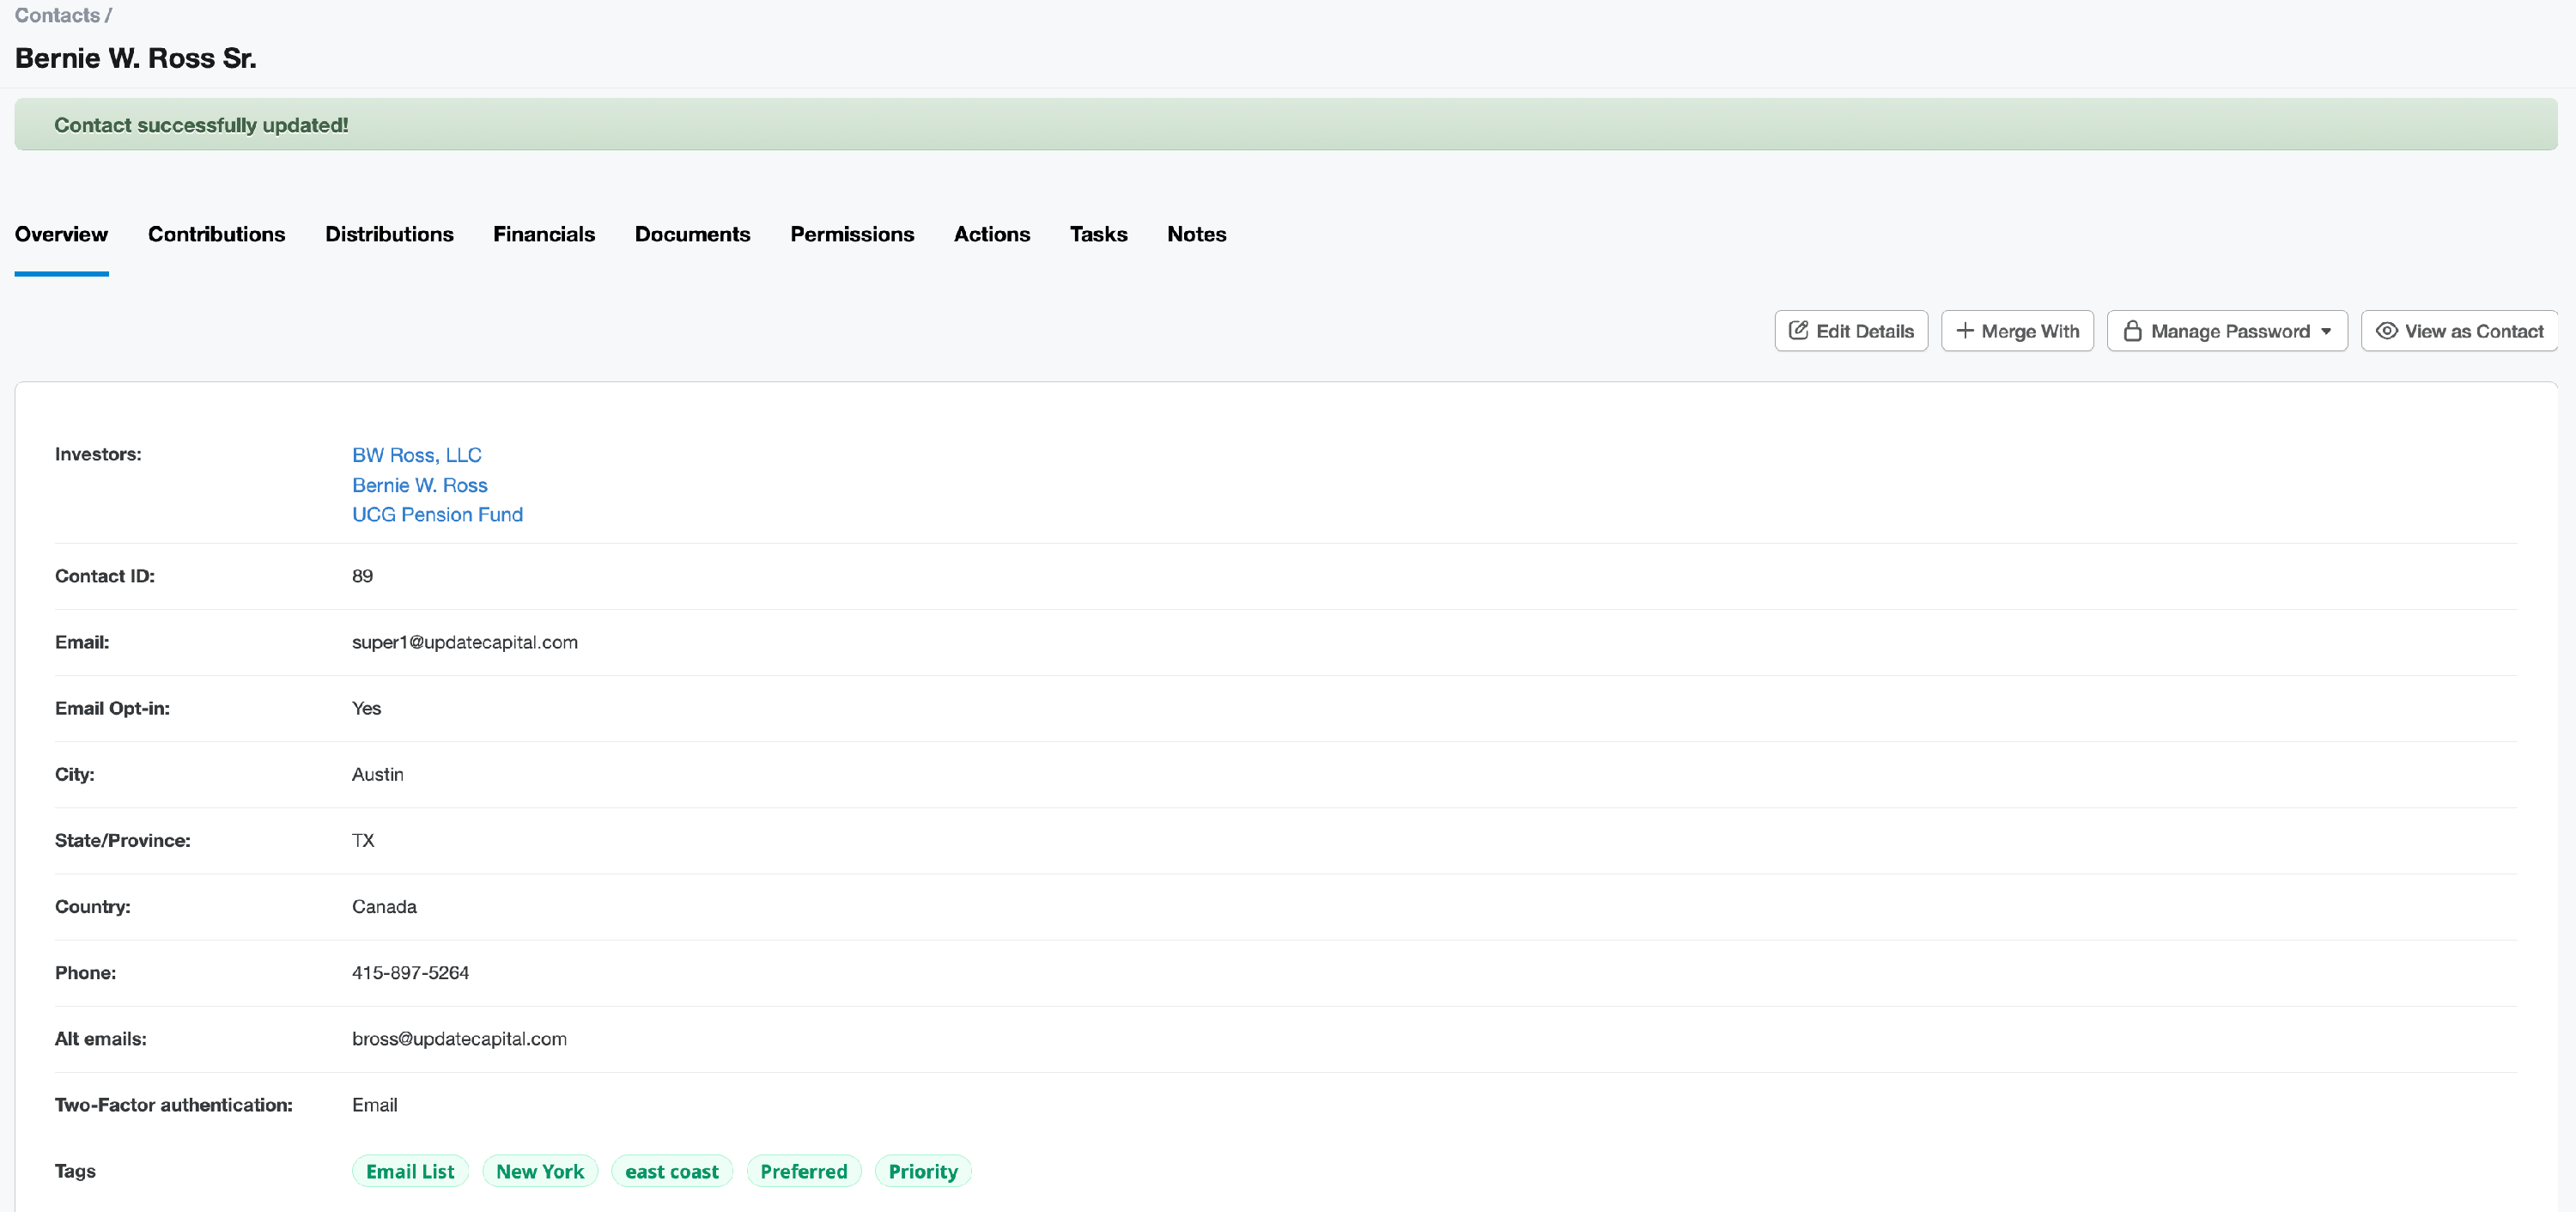
Click Save. A green banner appears to notify of successful tag assignment.


Remove Tags
You can remove tags in one of two ways:
- Bulk Remove Tags from to multiple contacts
- Remove Tags from a specific contact
Bulk Remove Tags
- Navigate to Functions > Tags.
- In the field to the left of the Remove Tags From button, enter the tags to remove.
-
Use the checkboxes to select the contacts and click the Remove Tags From button.

- A green banner appears to notify of successful tag removal from the selected contacts.

Remove Tags from a Specific Contact
-
From the Contact Details page: Overview tab click Edit Details.
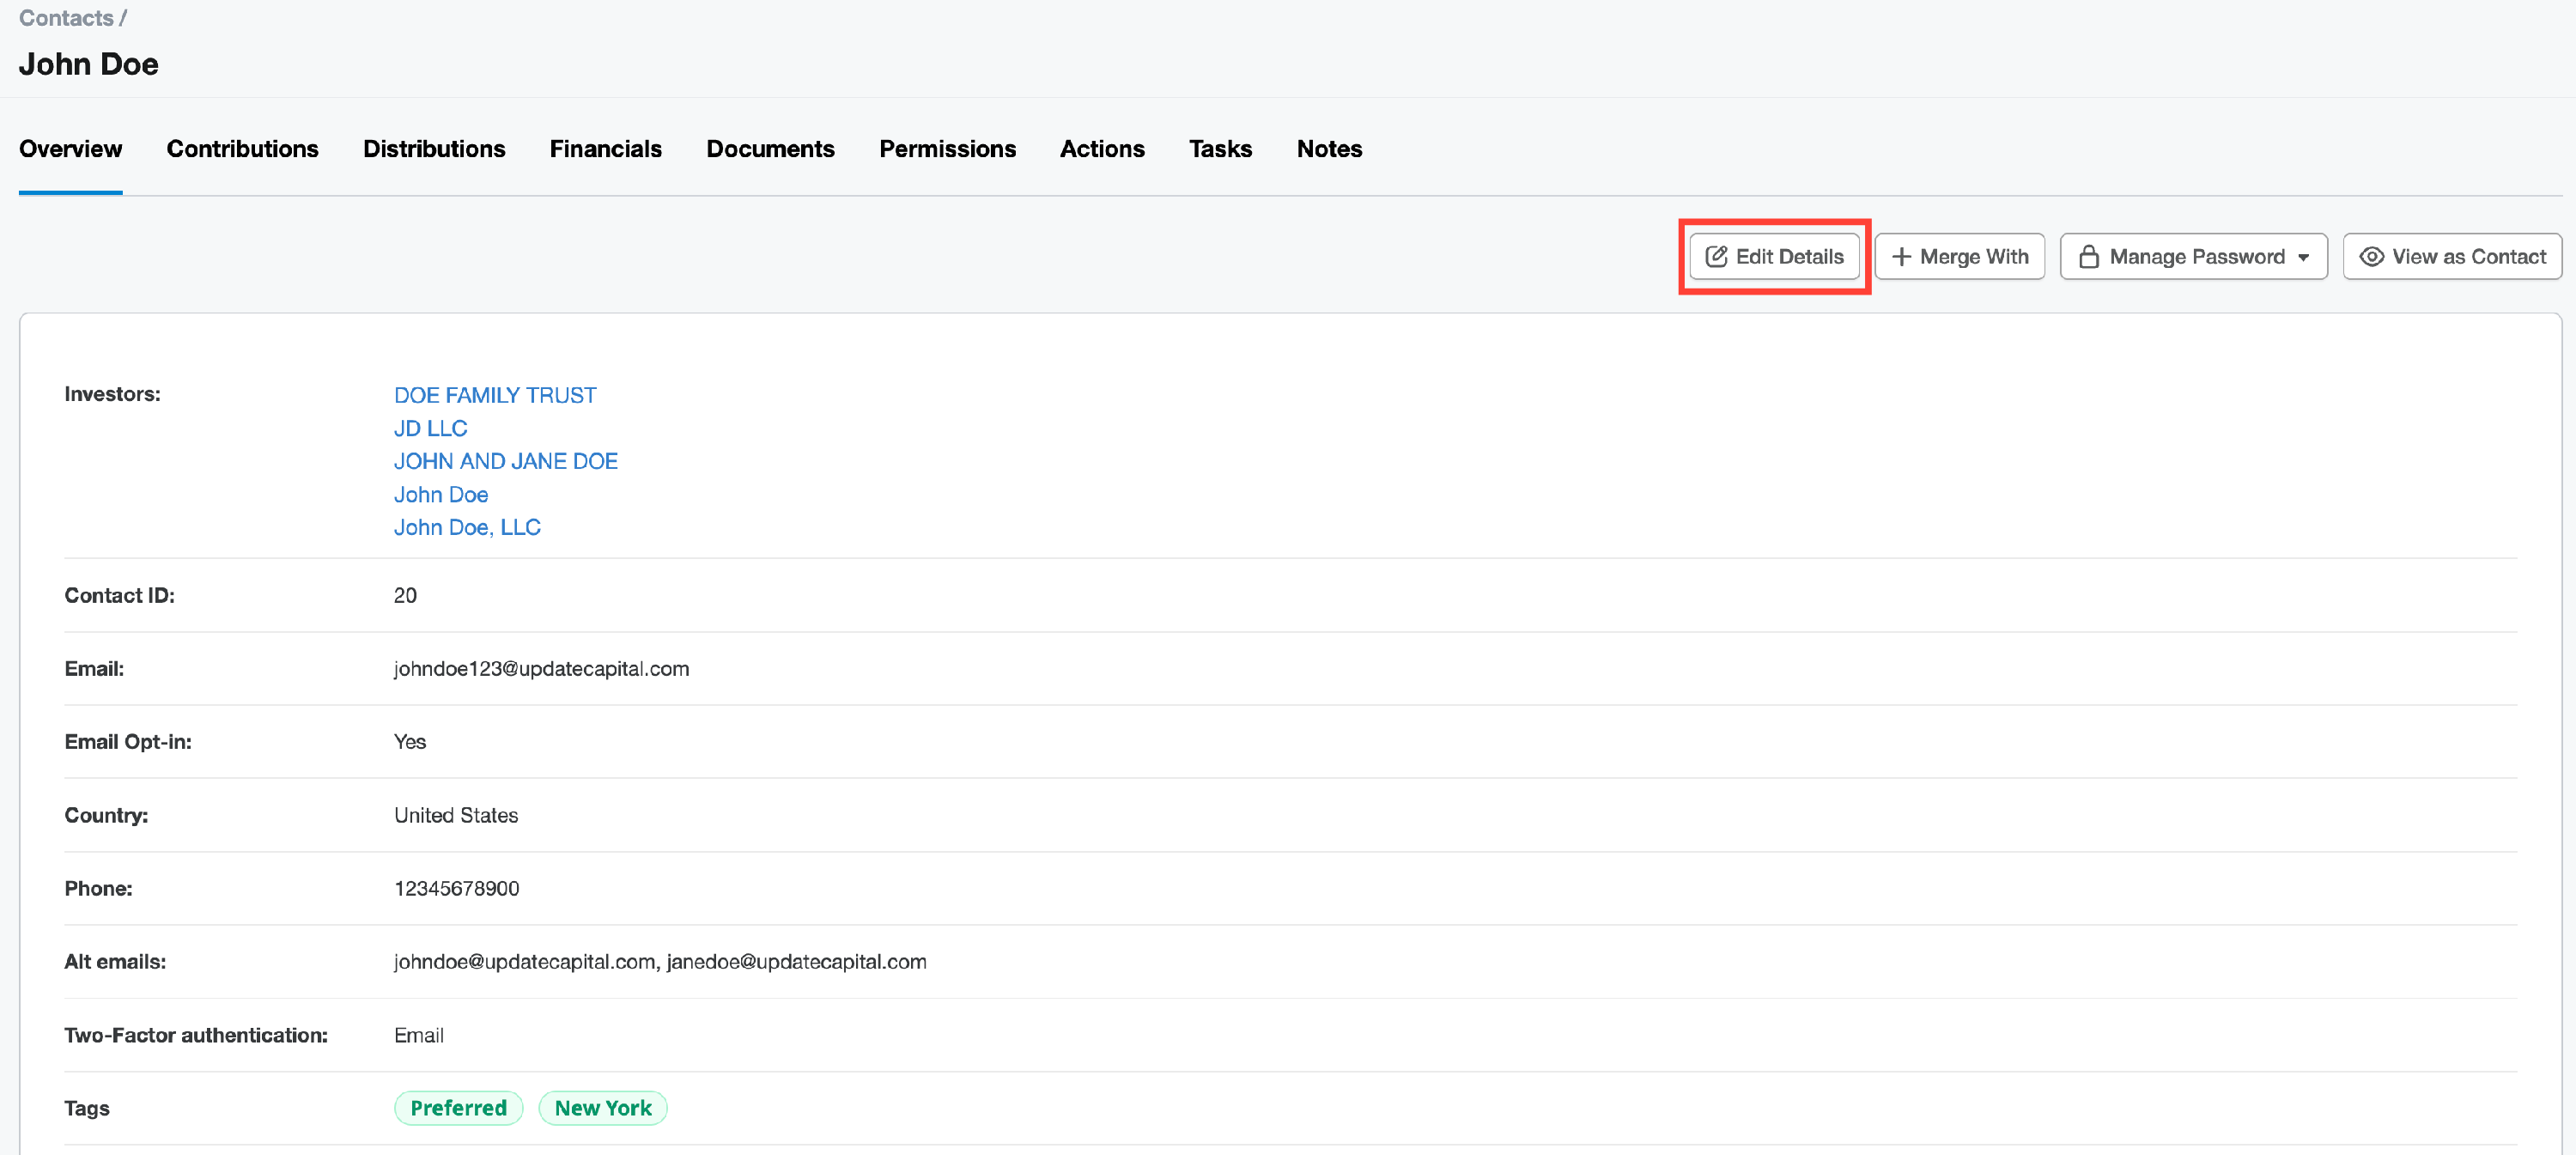
-
Scroll to the Tags section, locate the related tag and click the X to remove.
- Click Save.

