Newsletter Wizard
The Newsletter Wizard allows admins to compose and send targeted email communications to investors across multiple funds. This involves a guided, three-step process that takes you from drafting content all the way through to sending — with a full recipient review along the way and ability to preview before sending. Newsletters can also be optionally published as Fund Updates, making the content visible to investors/contacts directly in their investor portal view.
Key Areas of Newsletter Wizard
Key Areas of Newsletter Wizard
The Newsletter Wizard breads the process down into logical steps. Each step has the following key areas:
- Workflow Steps - Indicates the total number of steps in the workflow and where users are in the process. A green checkmark next to the step indicates that the step is completed.
- Status - Indicates the newsletter status:
- Newsletter Draft - Not yet sent
- Newsletter Sent - Successfully sent
- Fund Update Published - newsletter has been published to the investor portal as a fund update
- Selection / Composition Area - As admins move through the workflow, this area allows them to make selections as required.
- Newsletter Details - Provides a live summary of the newsletter as admins move through the workflow.
- Action Buttons - Allows admins to move forward or back through the process, save changes or delete before publishing the newsletter, as well as publish the newsletter as a fund update.

Use the Newsletter Wizard
-
Navigate to Communications located under the Functions menu.
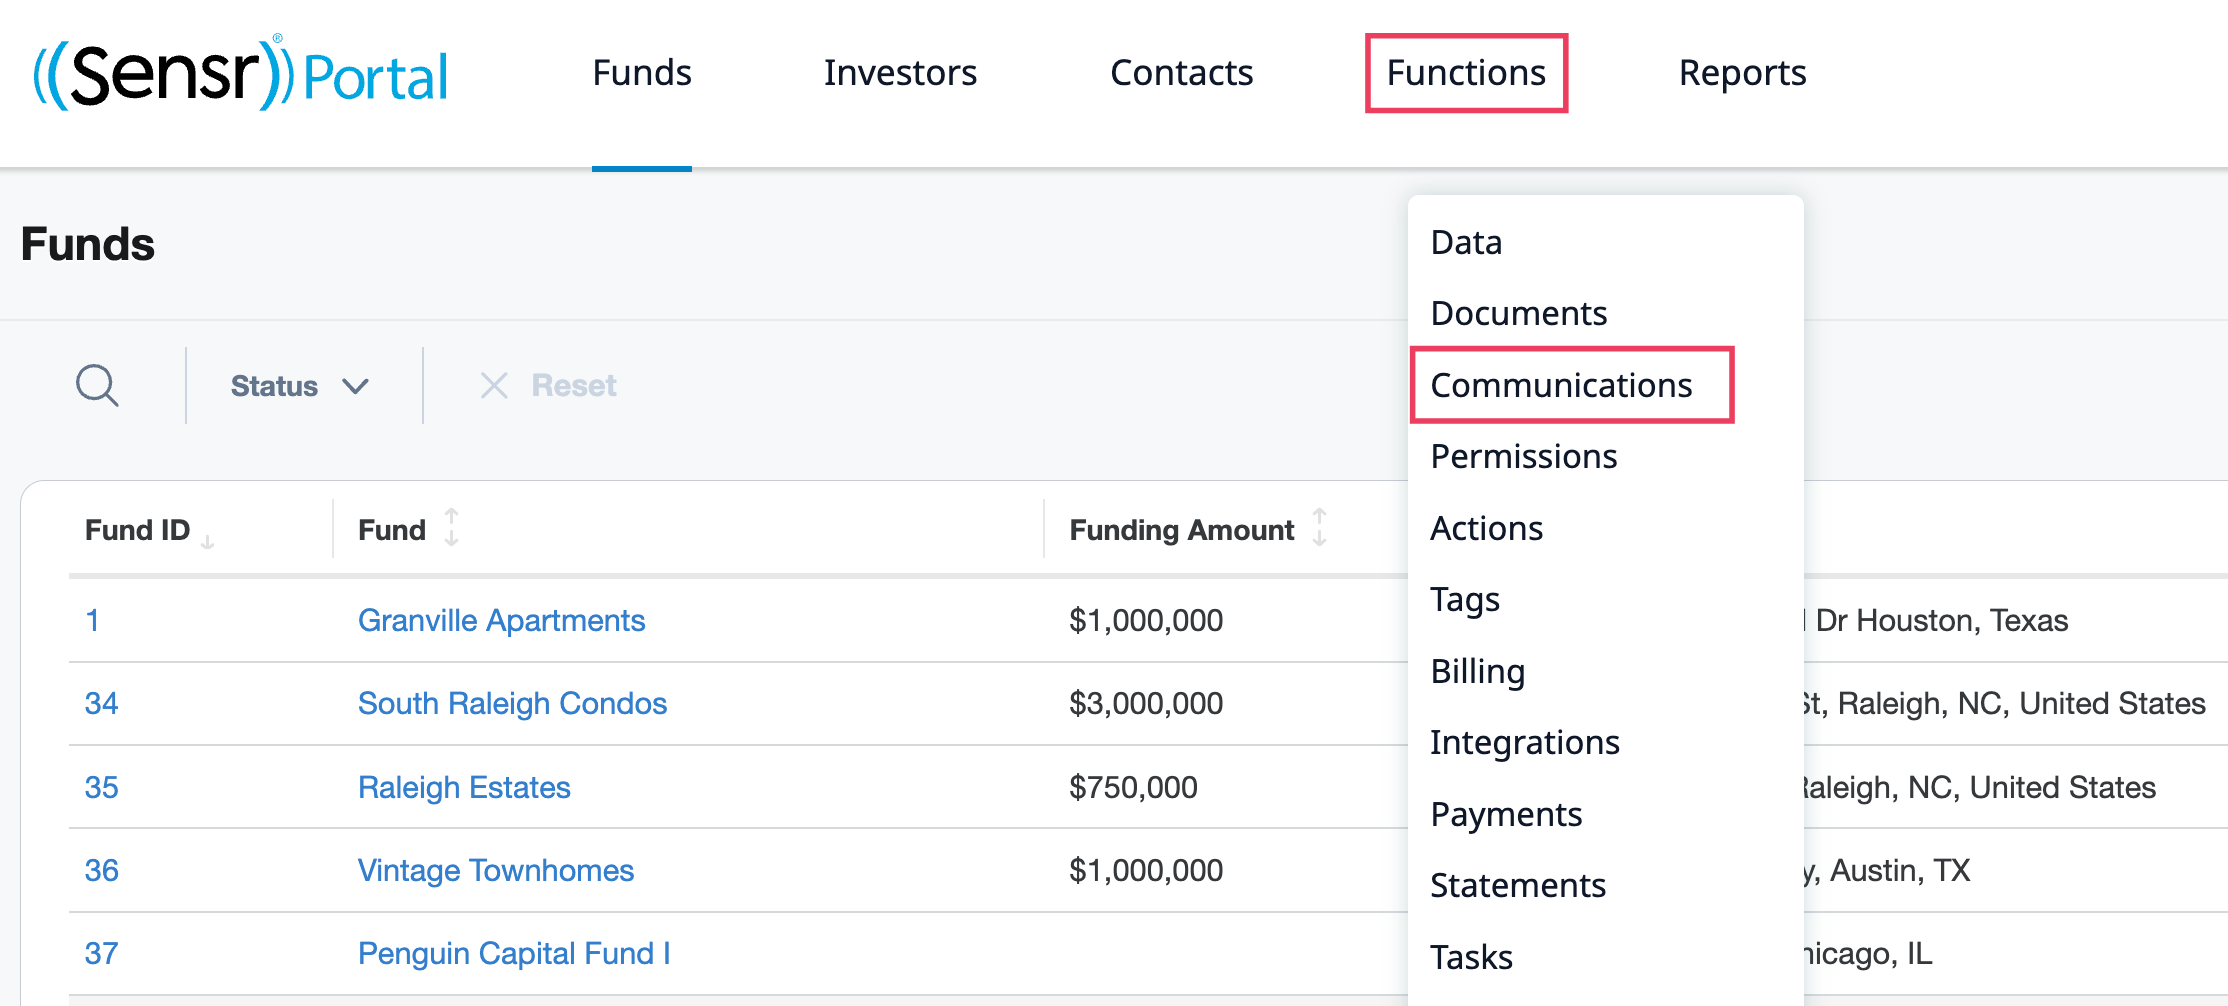
- The page is organized in tabs based on communication type. Click on the Newsletters tab and click Compose. This launches the wizard.


Step 1 - Compose Newsletter
Review the various fields and options to complete:
| Field | Description |
|---|---|
| Select Funds (required) | Choose one or more funds this newsletter relates to. Only published funds appear in this list. At least one fund must be selected before you can continue. |
| Select Template (optional) | Choose a pre-built template to pre-populate the Subject and Body. Note: selecting a new template will overwrite any changes you've already made. |
| Subject (required) | The email subject line. You can insert dynamic variables (e.g., contact name, CRM fields) using the variable selector. These personalise the email for each recipient. |
| Body (required) | The main content of the newsletter. Supports text formatting, images, and merge tags for personalization. |
| Attachments (optional) | Upload one or more files to attach to the newsletter. Two checkbox options become available once a file is attached: |
|
|
• Include attachments in email — sends the files directly in the email. (Only available if your organisation has email attachments enabled.) |
|
|
• Include attachments in fund update — if you choose to publish the newsletter as a Fund Update (Step 3), the attached files will also appear in the investor portal. |
TIP: The Continue button stays disabled until at least one fund is selected and both Subject and Body are completed. You can click Save Changes at any point to save your progress without moving forward.

Step 2 - Select Recipients
The table displays a pre-filtered list of contacts who are eligible to receive the newsletter, based on access to the selected fund(s) in Step: 1 - Compose Newsletter. Use the additional Contact, Investor, Fund and Tag filters as needed to select recipients.

NOTE: The yellow banner indicates any investors/contacts that do not have permission to receive the newsletter.
TIP: Below the recipient table, you can optionally add admin users to the CC or BCC fields. These admins will receive a copy of the newsletter when it is sent.
IMPORTANT: Email Attachments Availability
The ability to include attachments directly in the email is controlled by an organizational setting. If this setting is not enabled for your account, you will see a notice stating: "Attachments cannot be sent by email but can be included in a fund update in the investor view." The Include attachments in email checkbox will be greyed out.
Step 3 - Review
The Review page is the final step before sending. It displays an overview of all the recipients who will receive this newsletter, including their name, Contact ID, email, investor, and fund. Use the filters and buttons to verify everything looks right before sending.

- Search and Filters - Use the live search and available filters.
- Download CSV - The Newsletter Details and the table are downloaded as a CSV.
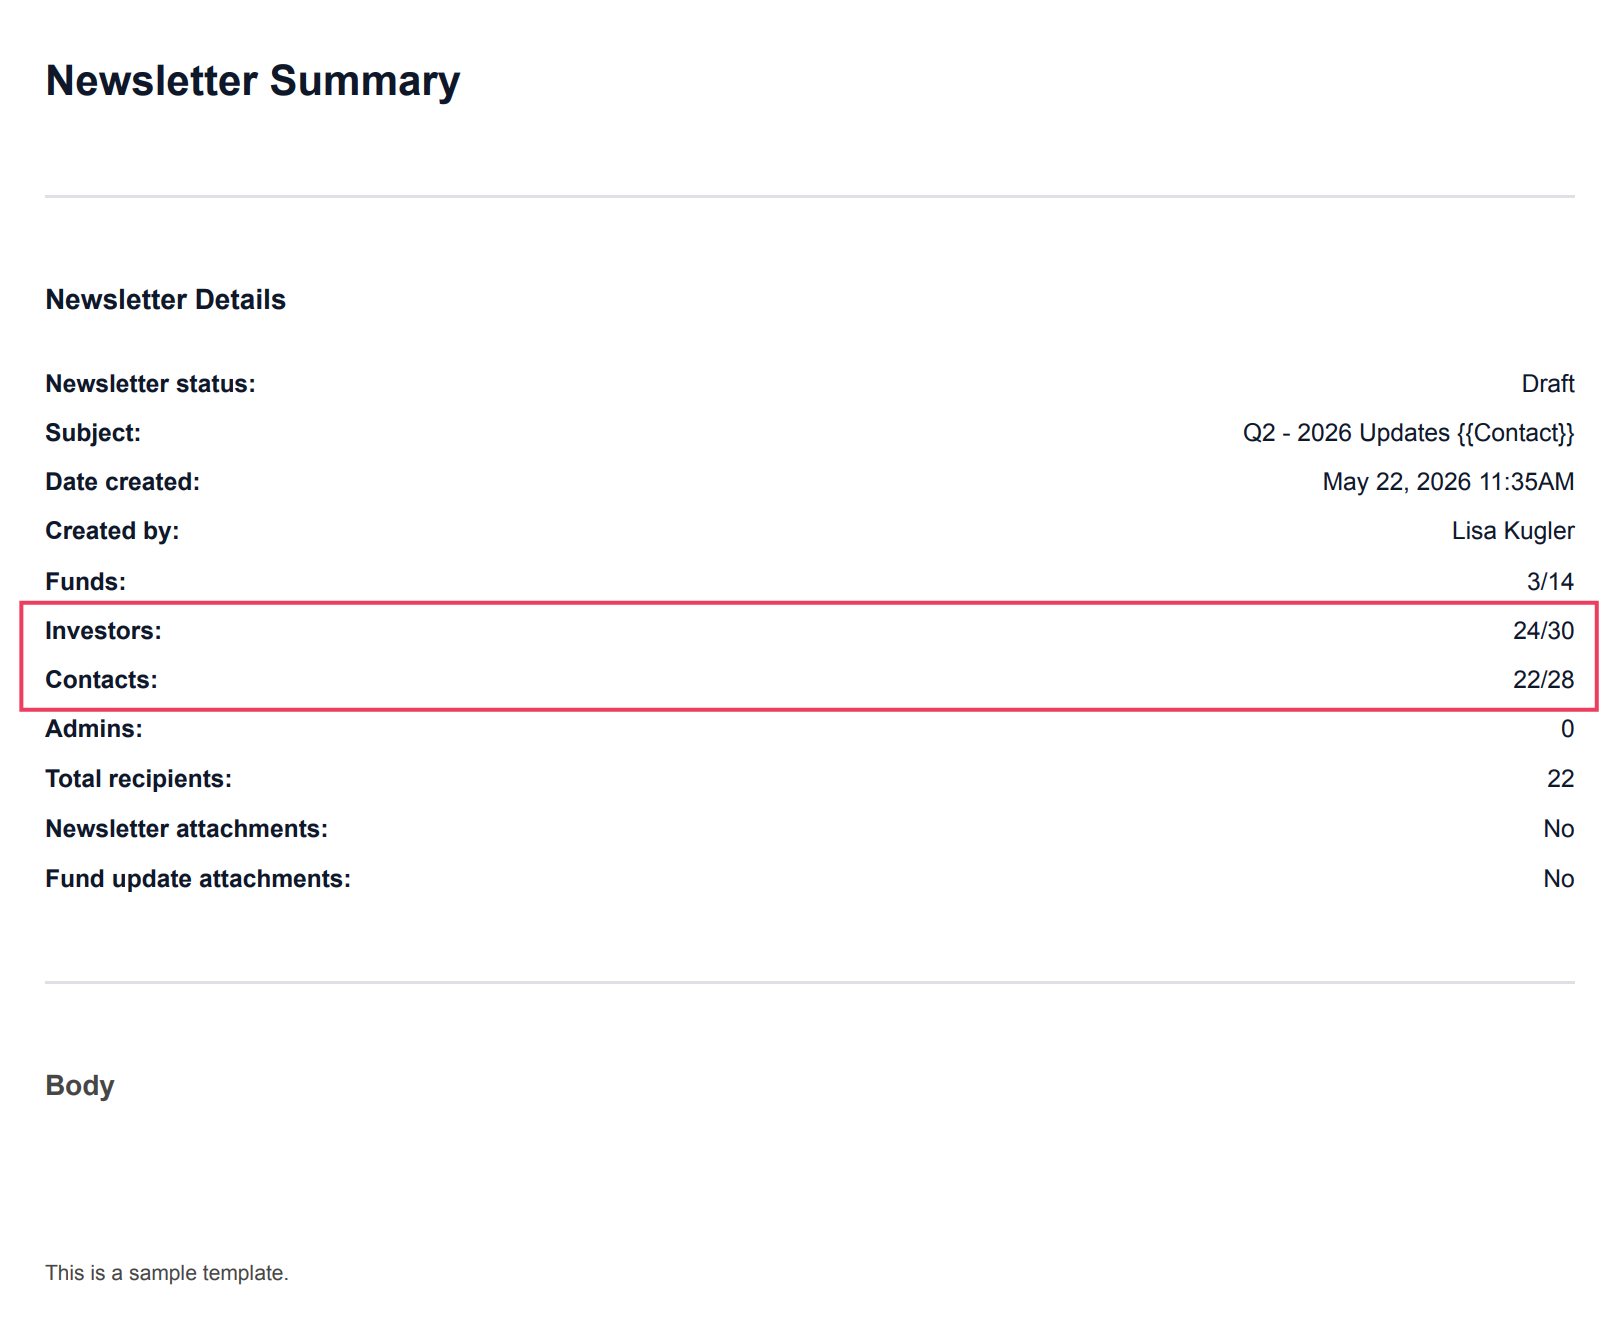
- Download Report - Downloads a PDF Summary of the newsletter.
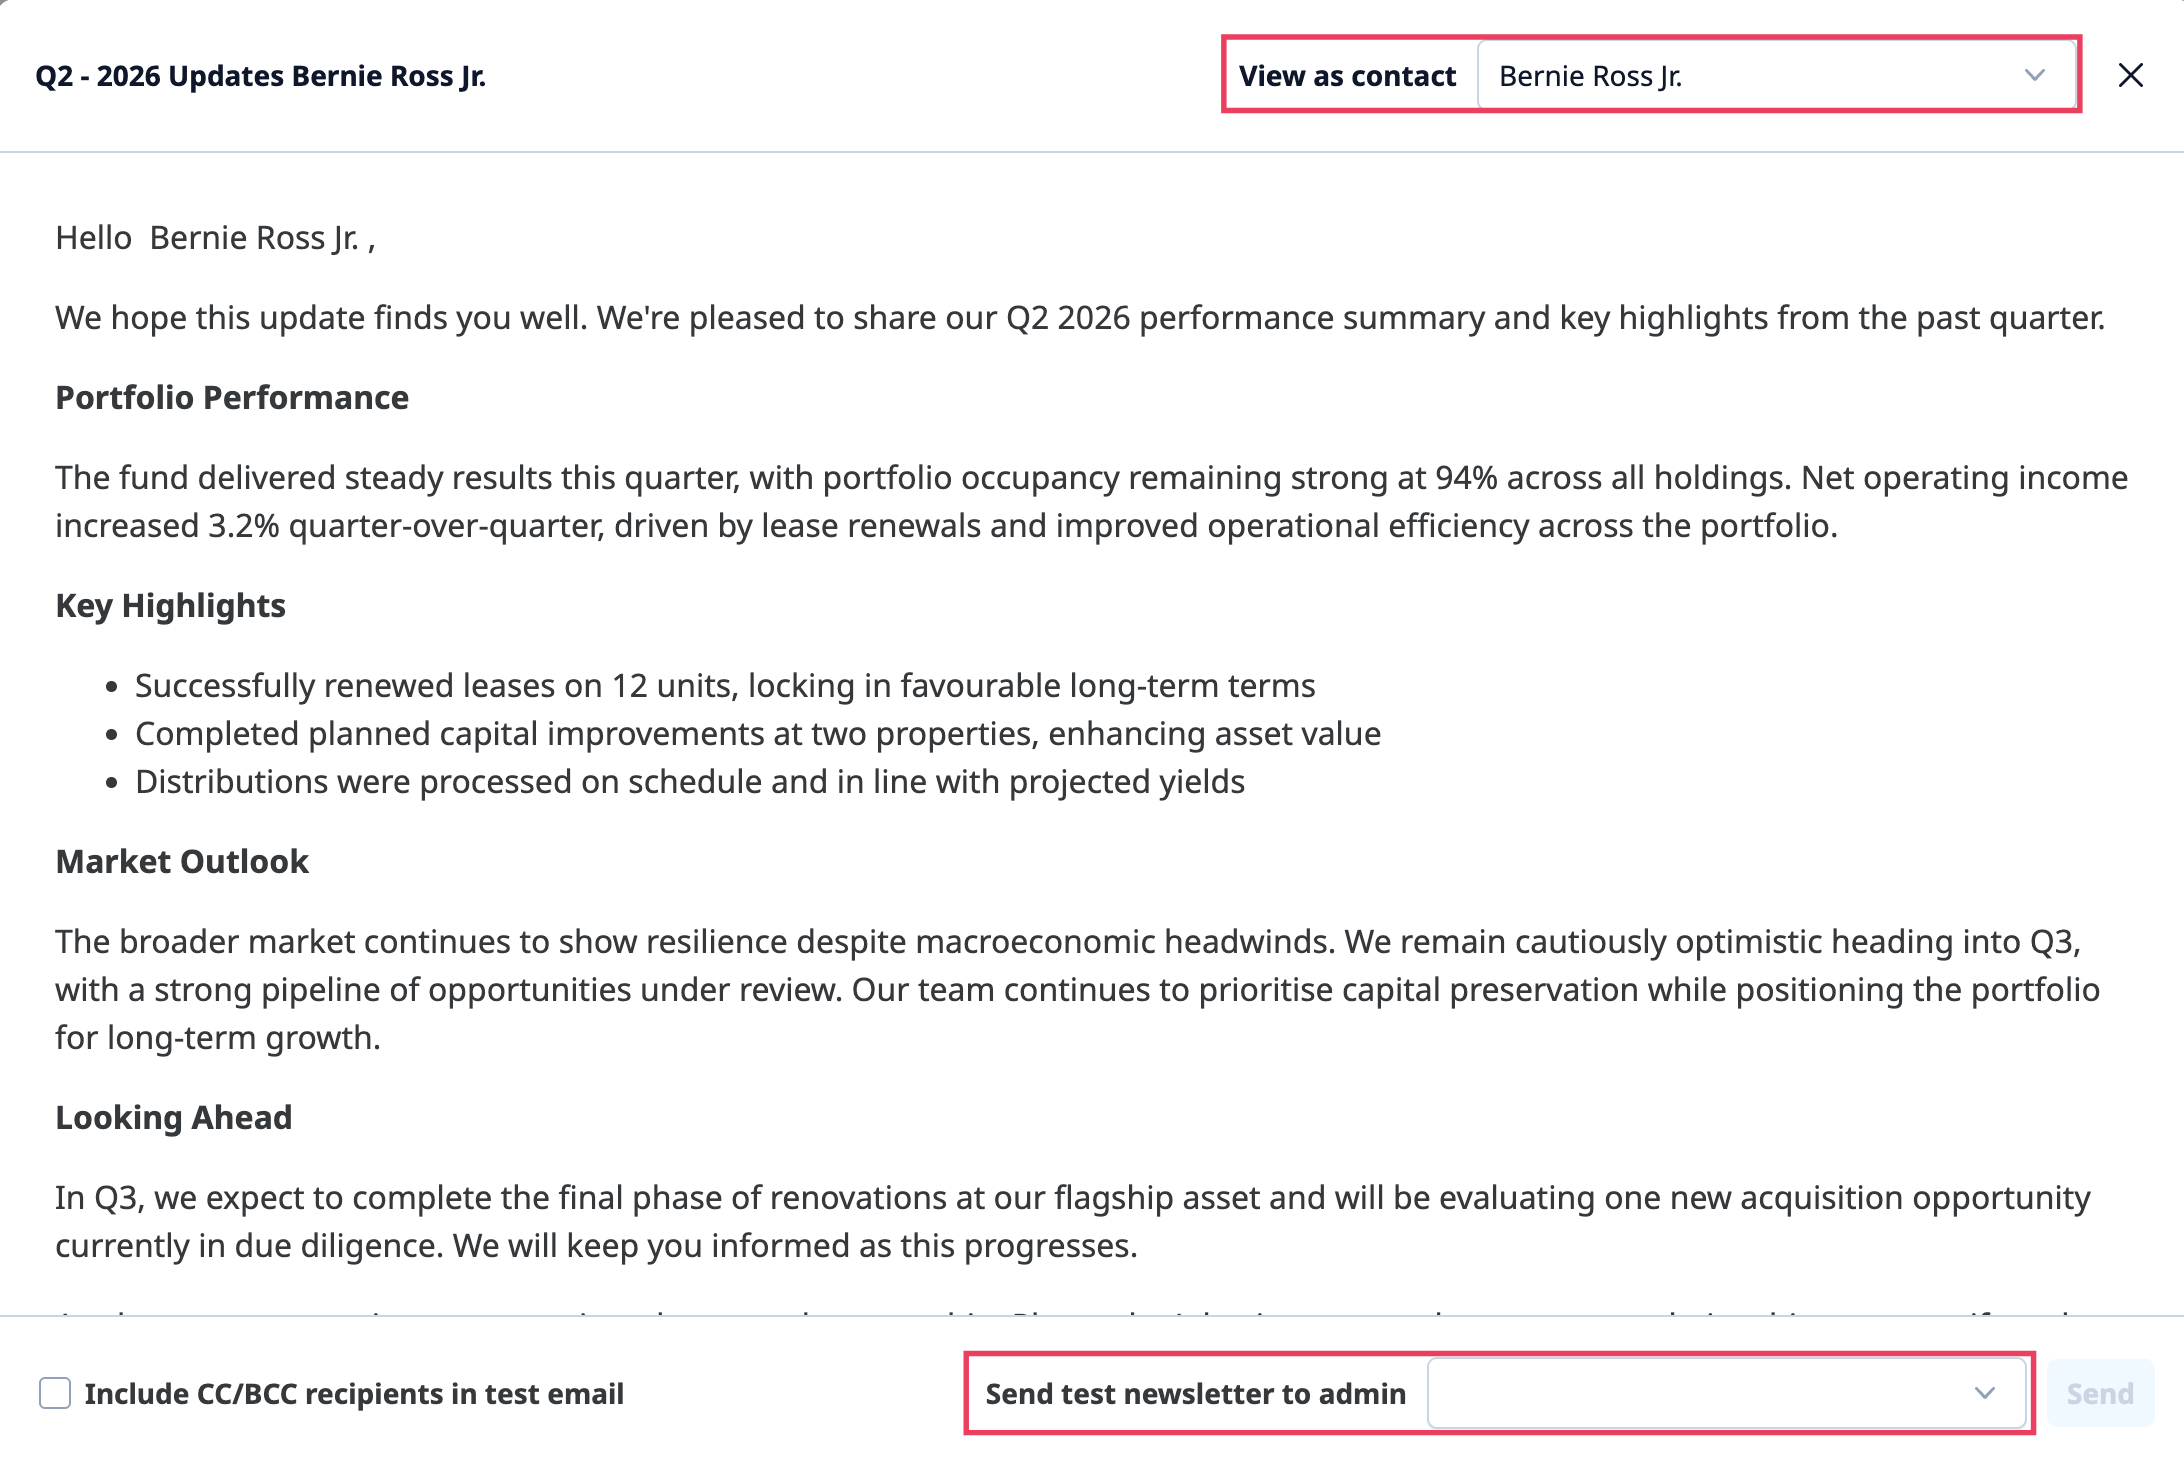
- Preview button - Opens a preview showing exactly what the newsletter will look like.
- Use the View as contact dropdown to preview personalised content for any specific recipient.
- Use the Send Test Newsletter to send a test version of the newsletter to a specified email for review before the real send. *Send test email can only be sent to an Admin email address.
- Publish as Fund Update - Publishes the newsletter content as a Fund Update, making it visible in the investor portal. If the newsletter is already published as a Fund Update, this button changes to Unpublish Fund Update.
- If attachments are included and the "Include attachments in fund update" checkbox was ticked during composition, those files will also appear in the update.
- Note: Clicking Unpublish Fund Update removes the update from the investor portal.
- Send Newsletter - Sends the newsletter to all selected recipients. This action is permanent and cannot be undone. A confirmation prompt will appear.
- Resend Newsletter - If the newsletter has already been sent, this button replaces allows you to send it again.
- Delete - Deletes the newsletter (only available before it is sent and before a Fund Update is published).
Accuracy Controls
The Newsletter Wizard has multiple controls to ensure accuracy adn completeness prior to sendign a newsletter. It is recommende that you review the controls below. A yellow alert will appear if there are any warnings to review and modify.
- Step 2: Select Recipients and Step 3: Review - A yellow banner displays a list of investors and contacts who do not have permission to receive the newsletter. The receipts list in the wizard is pre-filtered to exclude investors and contacts who do not have access to receive the newsletter due to either opting out of emails or being transferred out from all investors. Confirm Contact Permissions if needed.

-
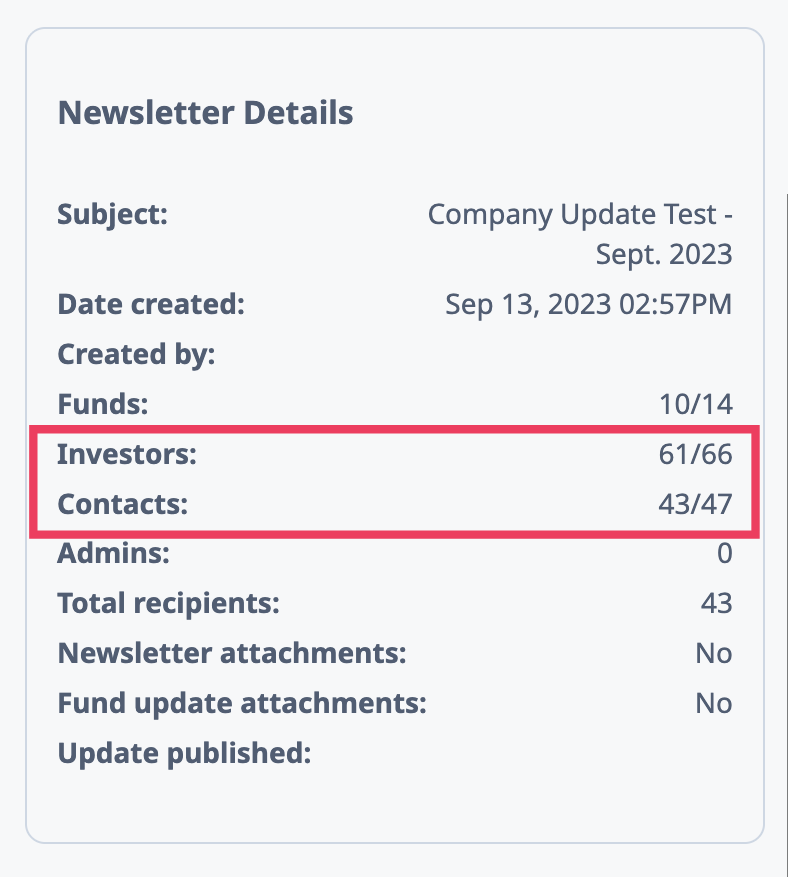
Step 2: Select Recipients - Newsletter Details section captures the Investors and Contacts counts, excluding investors and contacts that have either opted out of emails or have been transferred out from all investors.
- Step 3: Review - use the Download CSV button to review the recipient list in a separate file, as needed.
-
Step 3: Review - use the Download Report button to review the PDF newsletter summary, including investor and contact counts.
-
Step 3: Review - use the Preview button to validate the list of contacts under the View As menu for accuracy and send a test email, if needed.