Functions: Actions
Actions are a powerful way to require contacts to provide updated information, sign documents, or perform other tasks.
Actions Page
The Actions page is located under the Functions menu. Admins can view and modify existing actions and create new login actions

The Actions page includes a table of all actions by type. You can search by action name and type, or use the filters to locate a specific action. Up/down sorting arrows in the Action ID column allow you to adjust the order of actions, as needed. Refer to the Status column and totals to view the current status and verify quantity:
- Draft - the action has been created, but not assigned to any contact.
- Pending - the action has been assigned to contacts but not all of them have completed it.
- Complete - all assigned contacts have completed the action.
- Incomplete - at least one contact has cancelled the action.

Create Actions
- Navigate to Functions and click on Actions.
- Click +Add button.
- Choose the login action type from the menu and click Save.
Login Action Types
- Popup - this action type is used to notify contacts of things such as, Accept Terms of Use, wire instructions, review tax forms, etc.
- Profile Update - this action type is used to notify contacts to update their profile.
- Docusign - this action type is used to notify contacts there is a document ready for signing.
- File Upload - this action type is used to notify contacts a file upload is needed.
-
At this point, you will be on the new Edit Action page to complete the fields for the selected action type. Click Save when completed.
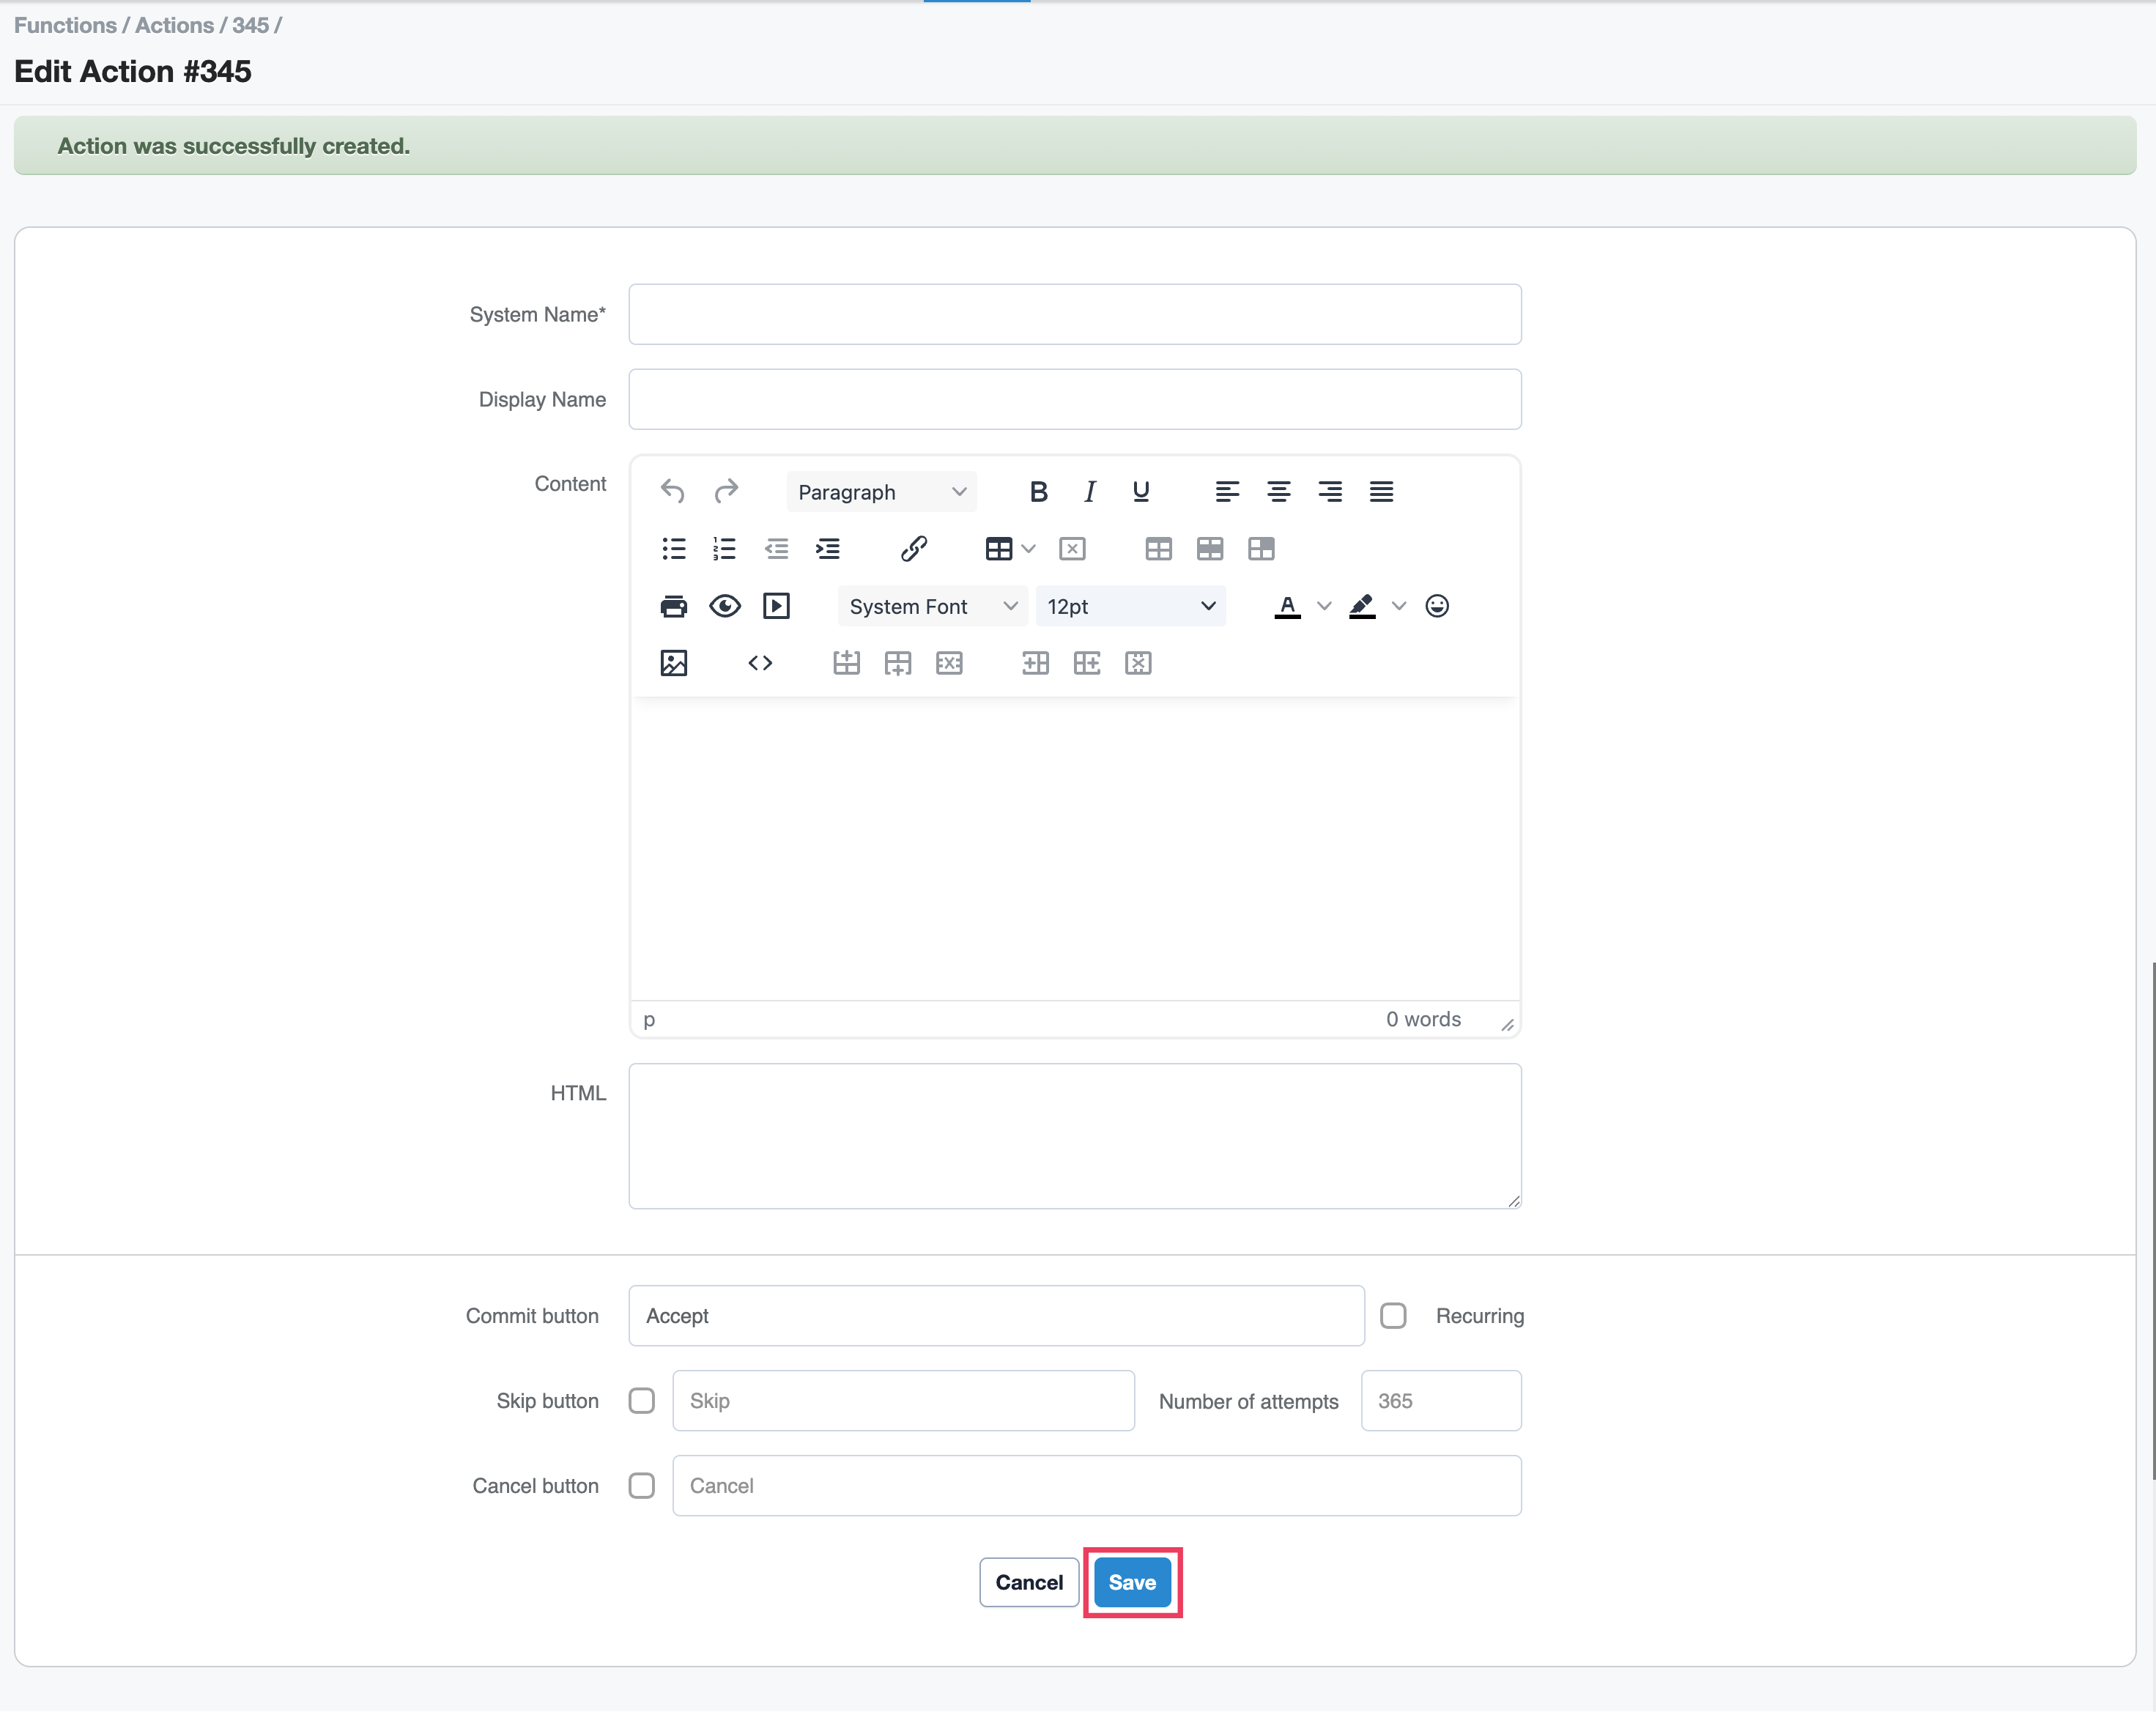

NOTE: Actions can be set up to include Skip or Cancel buttons to allow contacts to delay completing the action. However, Admins can set a preferred number of times an action can be skipped before the contact must complete it. In addition, there is a recurring option for admins to configure a popup action to appear indefinitely upon login as needed (e.g., to notify contact of various disclosures).
TIP: You can verify the action functions properly by creating a test contact.
Edit Actions
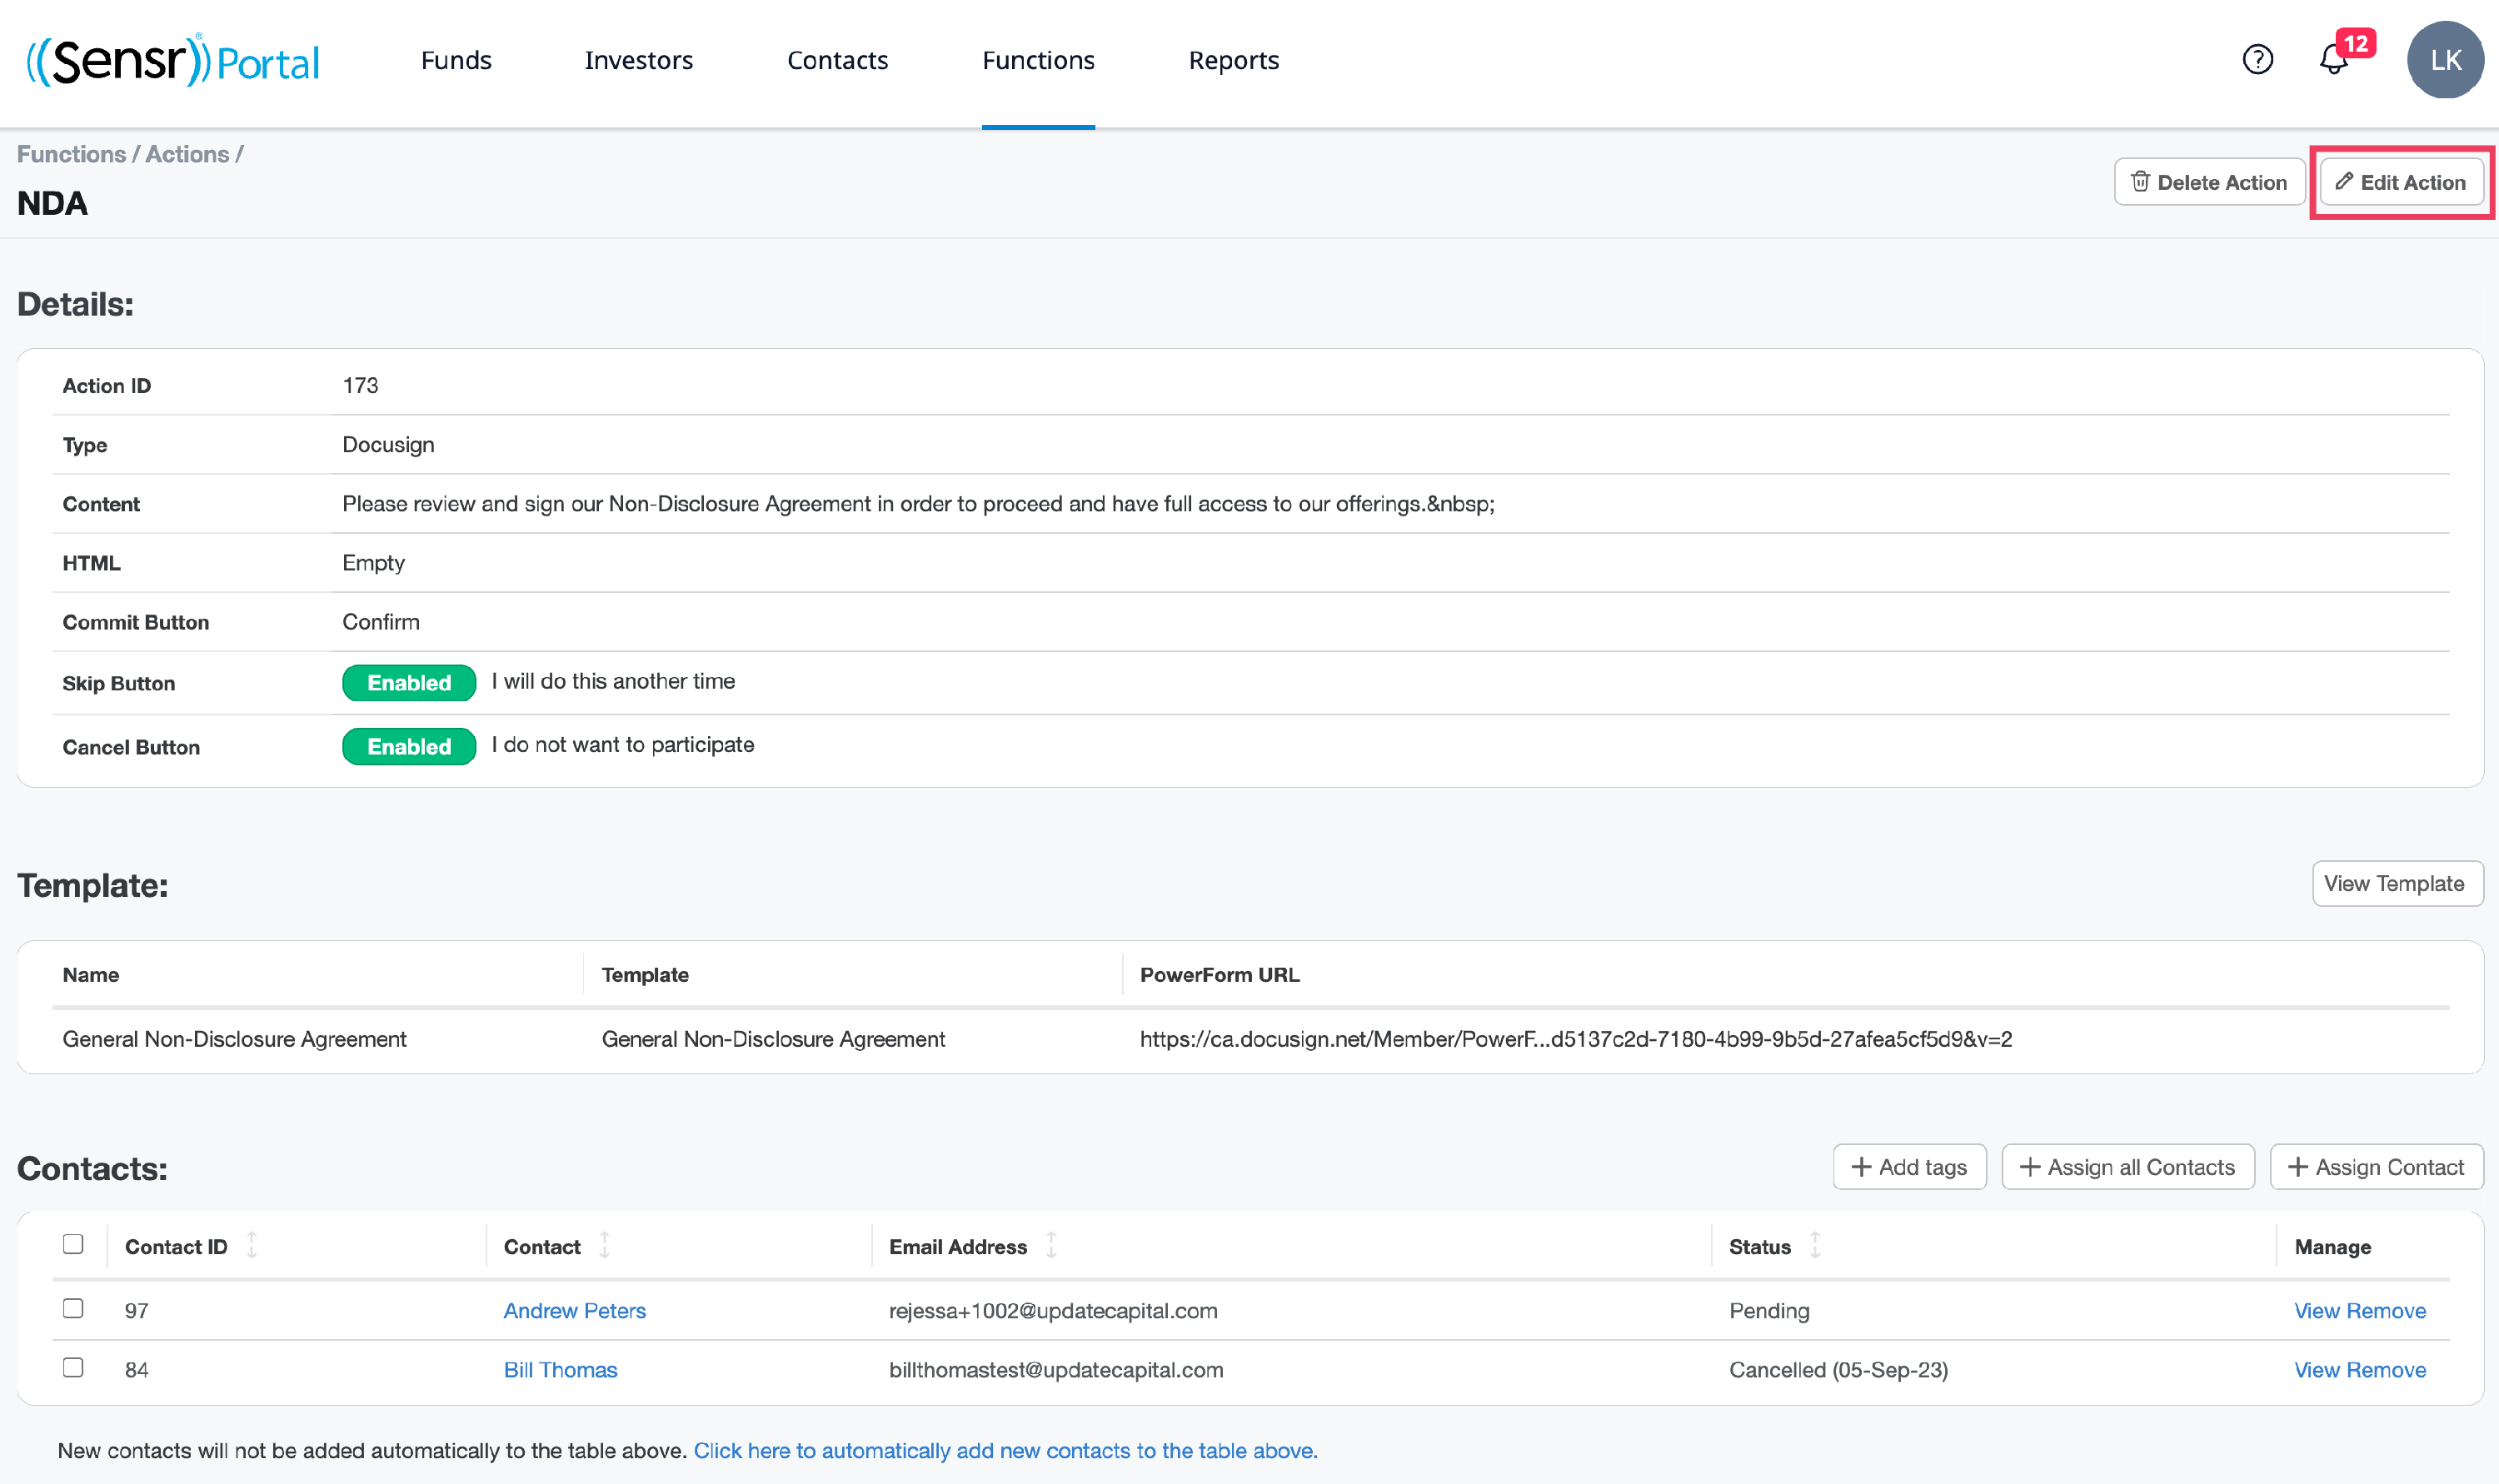
- From the Functions > Actions page, click on the related Action name. This opens the view page to review and modify action details.
-
Click Edit Action located in the upper right.
- Make the needed modifications and click Save.
