Functions: Permissions - Admin Groups
Sensr Portal allows you to control access using Admin Groups as described below:
| Group Type | Description | Access Enabled | Access Disabled |
| Default Group | All admins in the portal that are not part of a user created admin group |
|
|
| User Created Admin group | Admins in the portal that are part of one user created admin group |
|
|
| Read Only Admins | Read Only Admins can be in either Default Group or a user created admin group |
|
|
Add New Admins to an Admin Group
Set Up Admin Groups
- Navigate to the Functions menu and click on Permissions.

-
This opens up the Permissions page which is organized by tabs. Click on Admin Groups. Here you can view the existing admin groups, number of related funds and admins, as well as the group status.
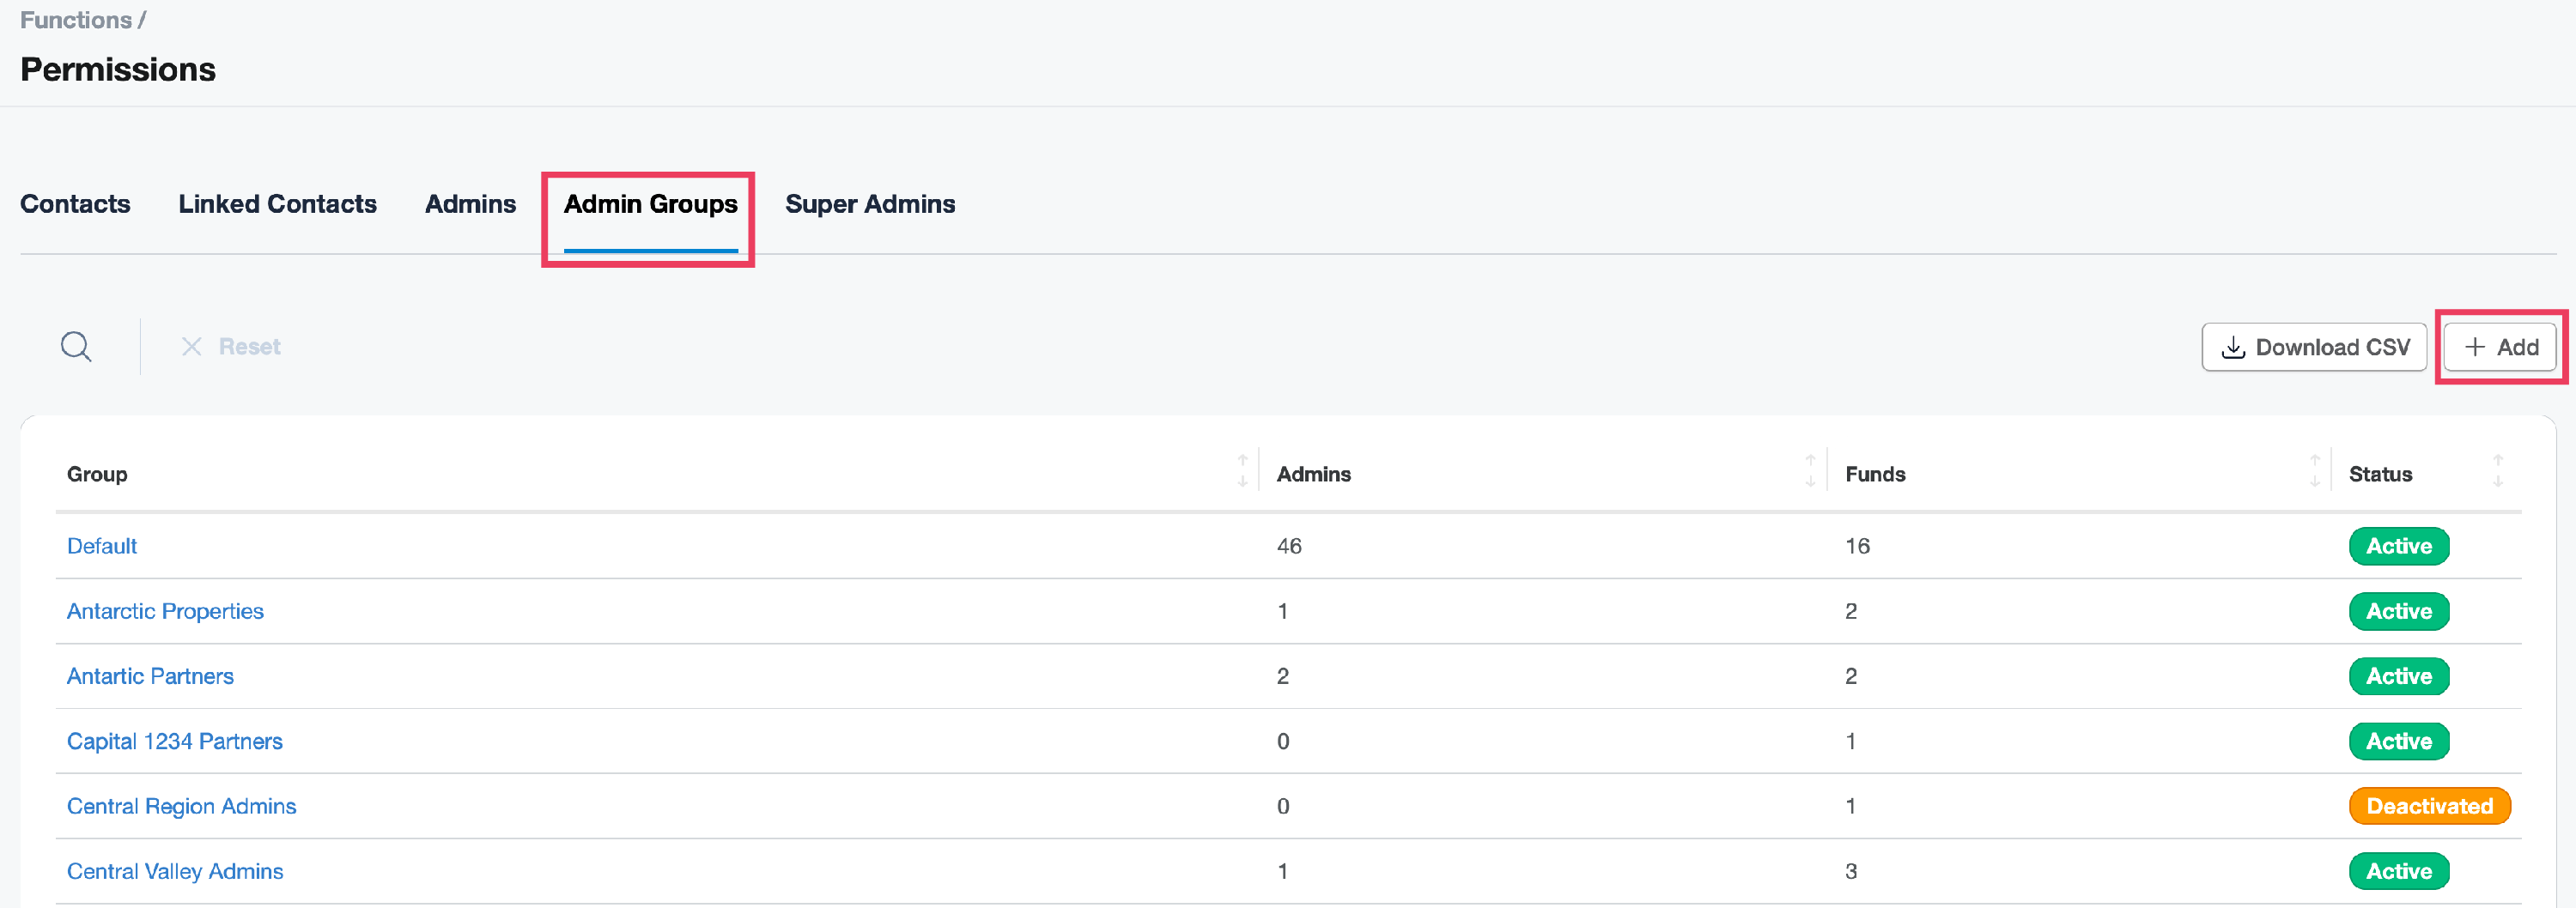
- To add a new Admin Group, click +Add.
- On the new admin group page, enter the Admin Group name and select which funds the group should have access to in the Funds menu. Click Save.


Add Funds to an Admin Group
Adding Funds to an Admin Group allows you to limit admin access to only those specific funds.
-
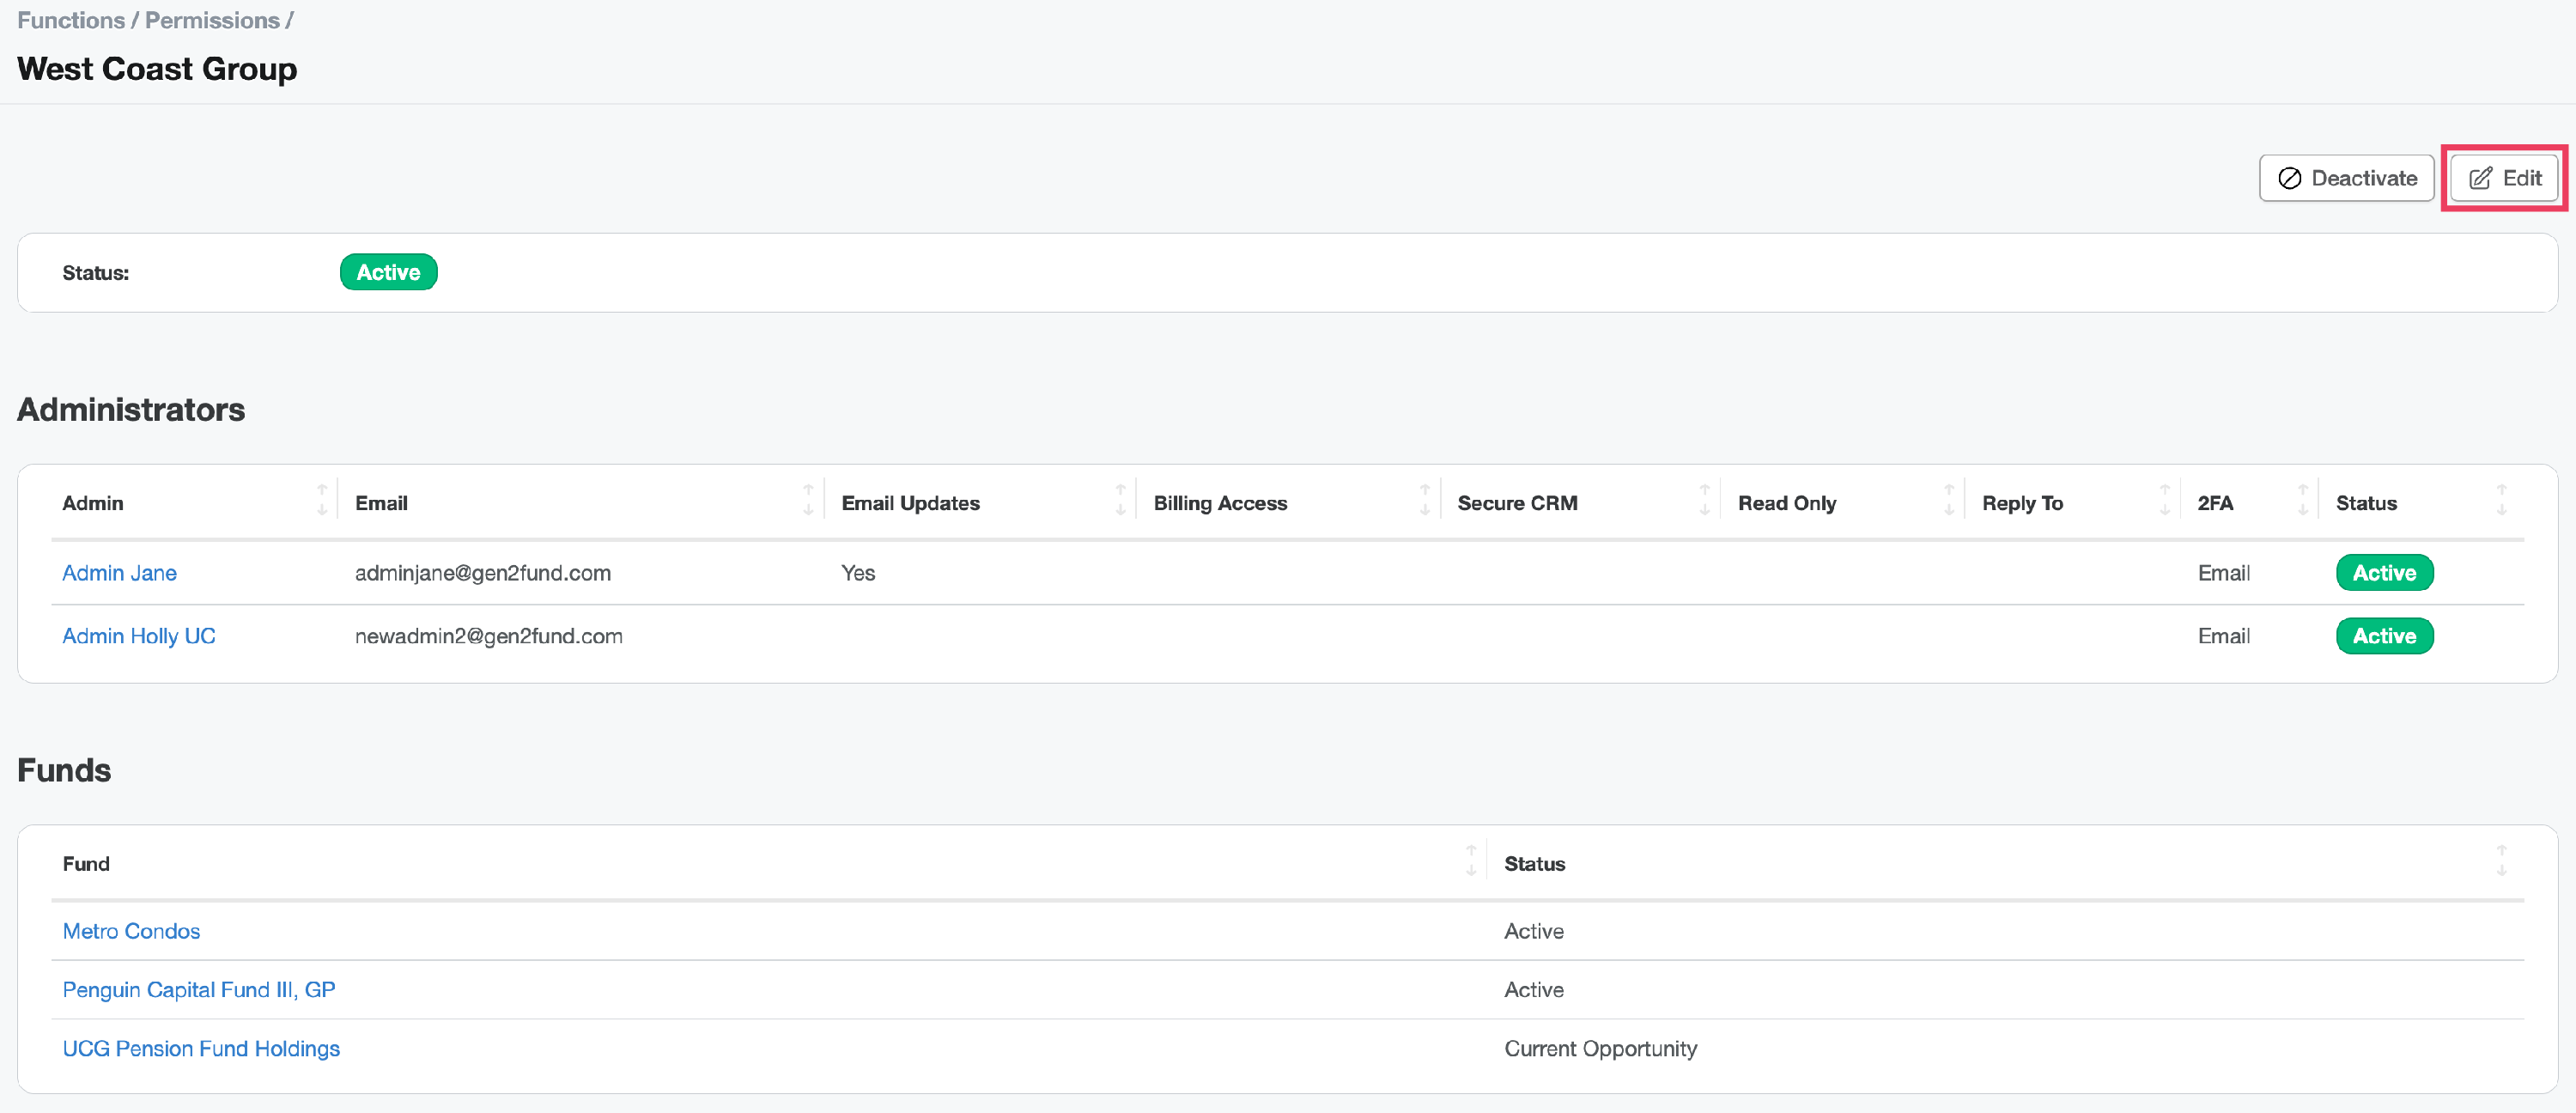
Select the group name from the main Admin Groups table and click Edit.
-
This opens the Edit Admin Group page. Here you can modify the group name and use the menu to select which funds the admin group can access.
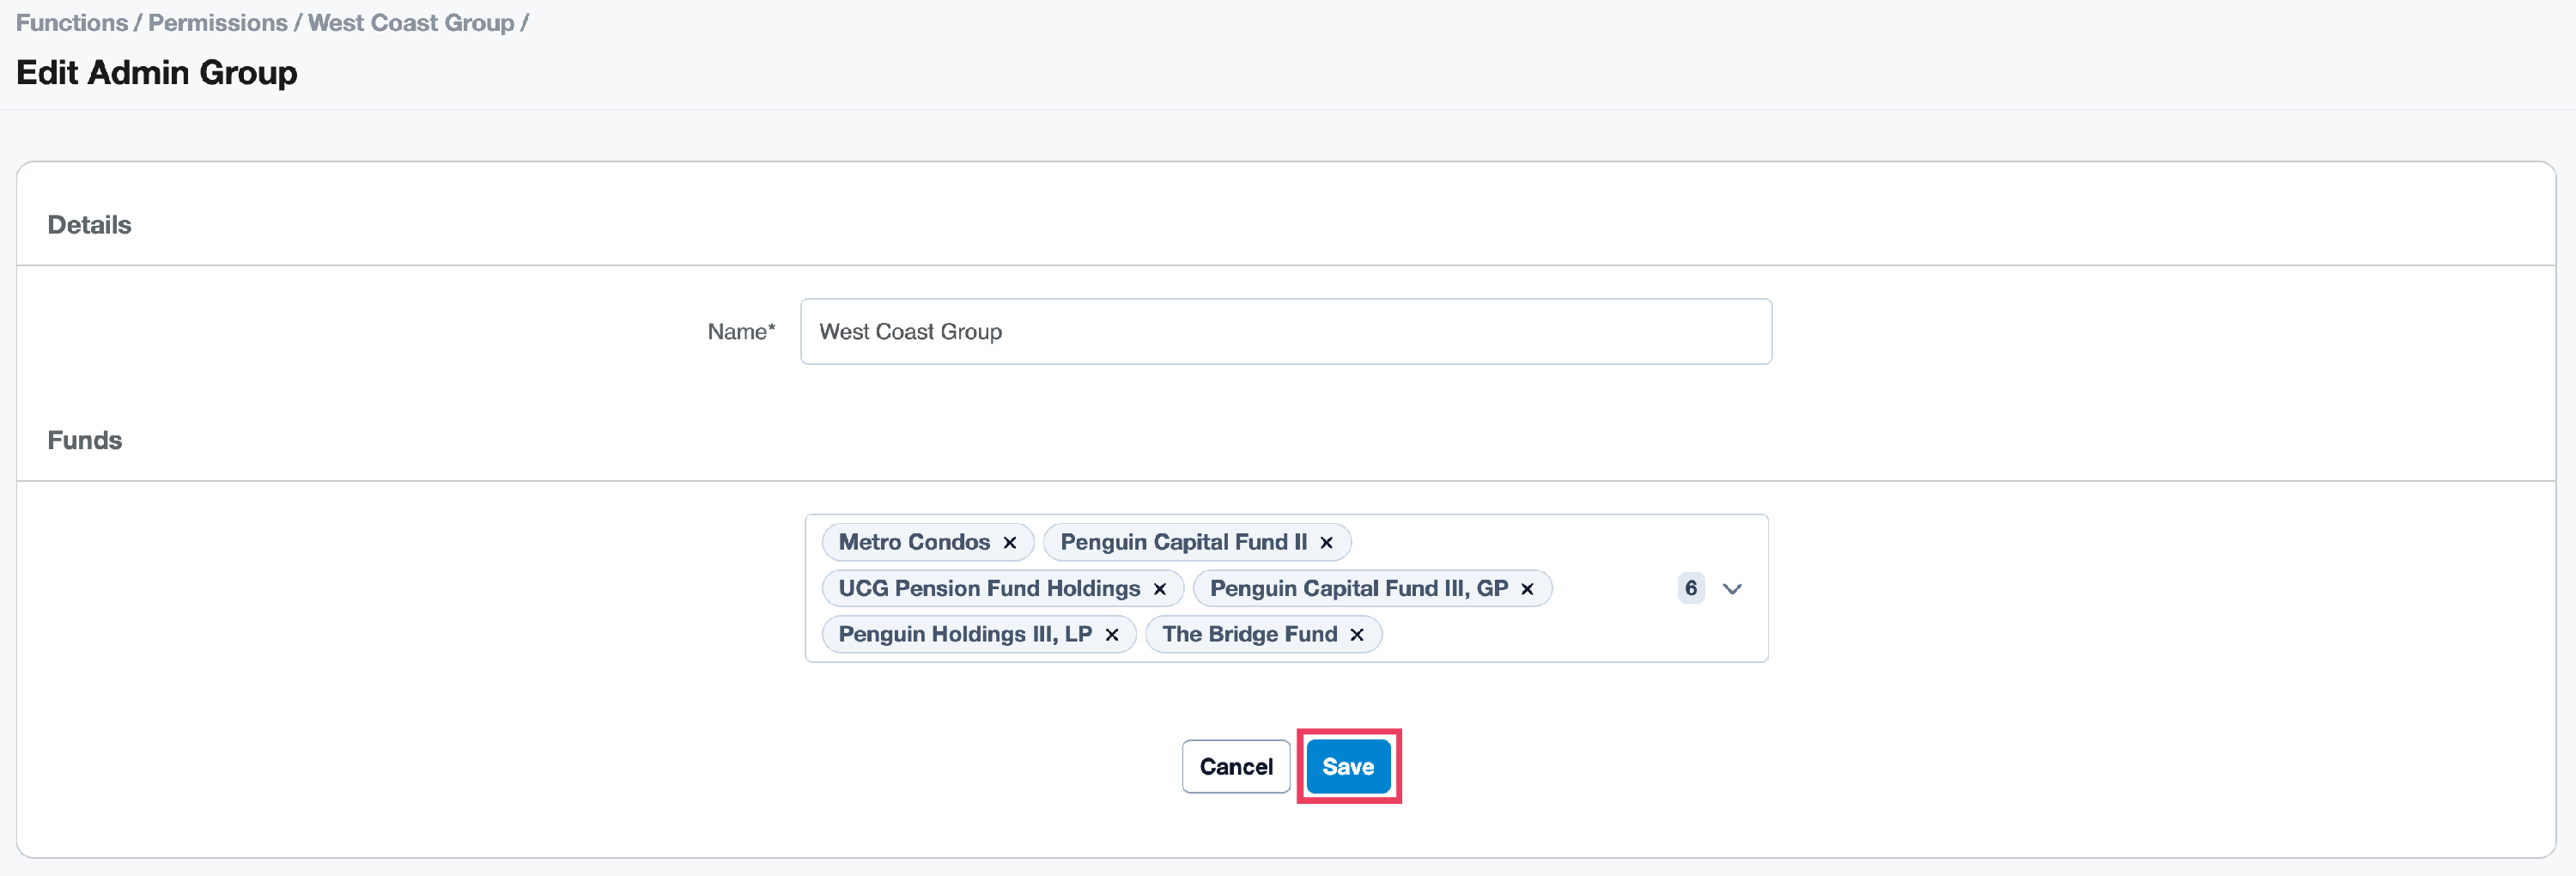
- When completed, click Save.


TIP: A fund can be included in many different admin groups. This is in contrast to admins, who only have access to one admin group (Default or a specific Subgroup).
Add New Admins to an Admin Group
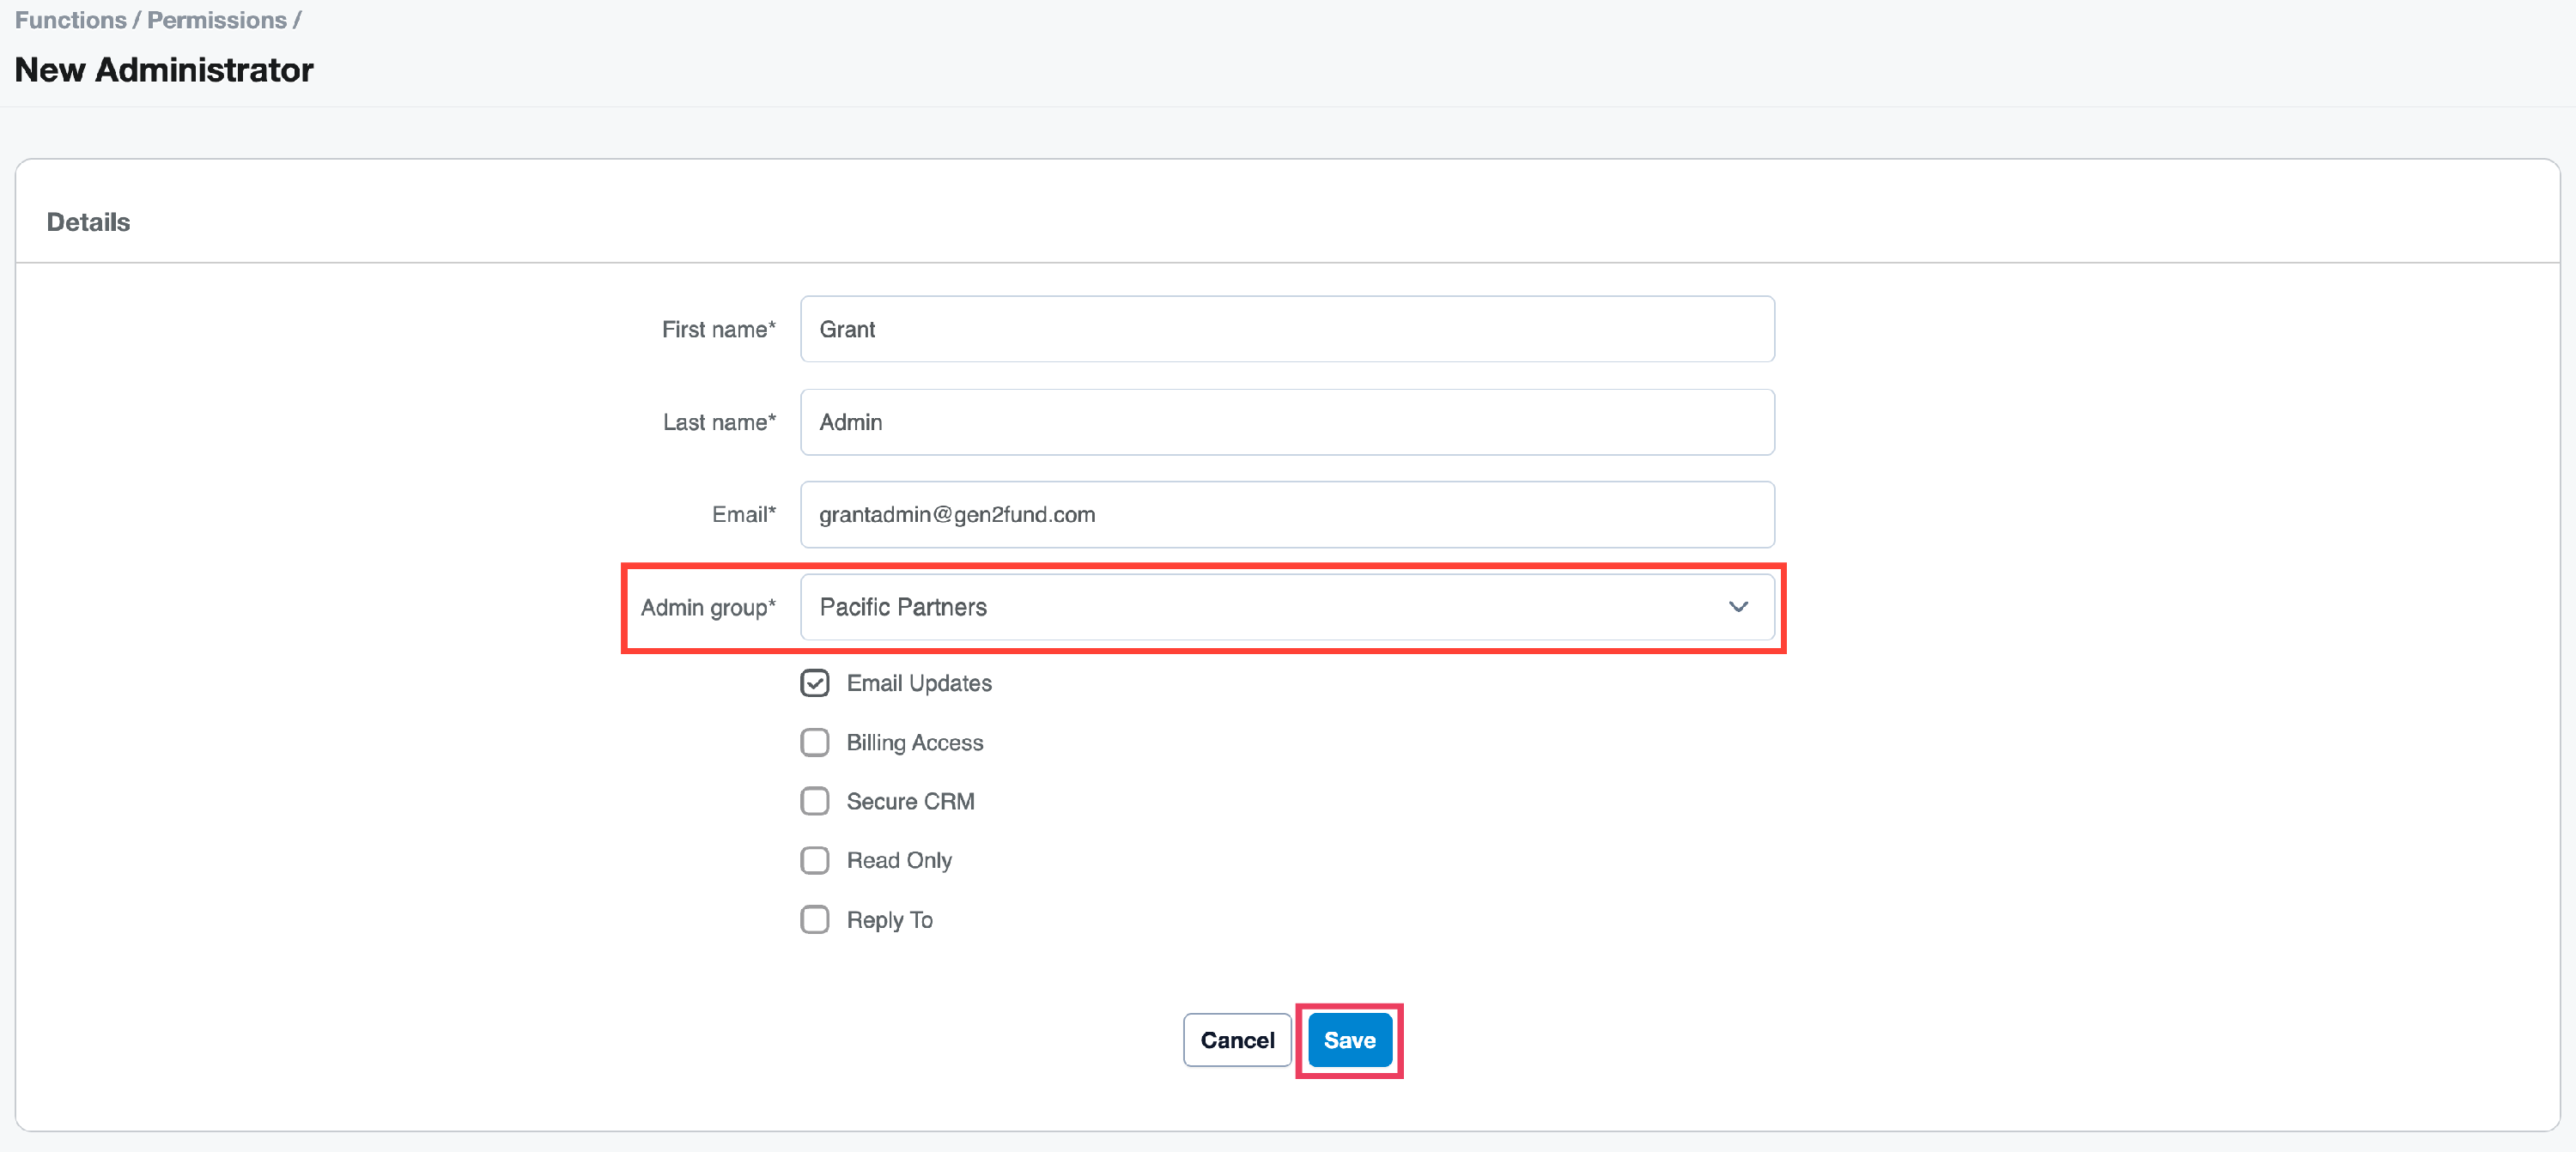
When an admin is added to the portal, they are automatically included in the Default group, unless another user created group is specified in the Admin Group menu.
-
Navigate to Functions > Permissions and click on the Admins tab. New Admins can be added to an Admin group at the time of creation using the Admin group menu. Use the checkboxes to define admin permissions in the admin group.
-
Alternately, an admin can also be added to a different admin group after creation, via the Edit option.
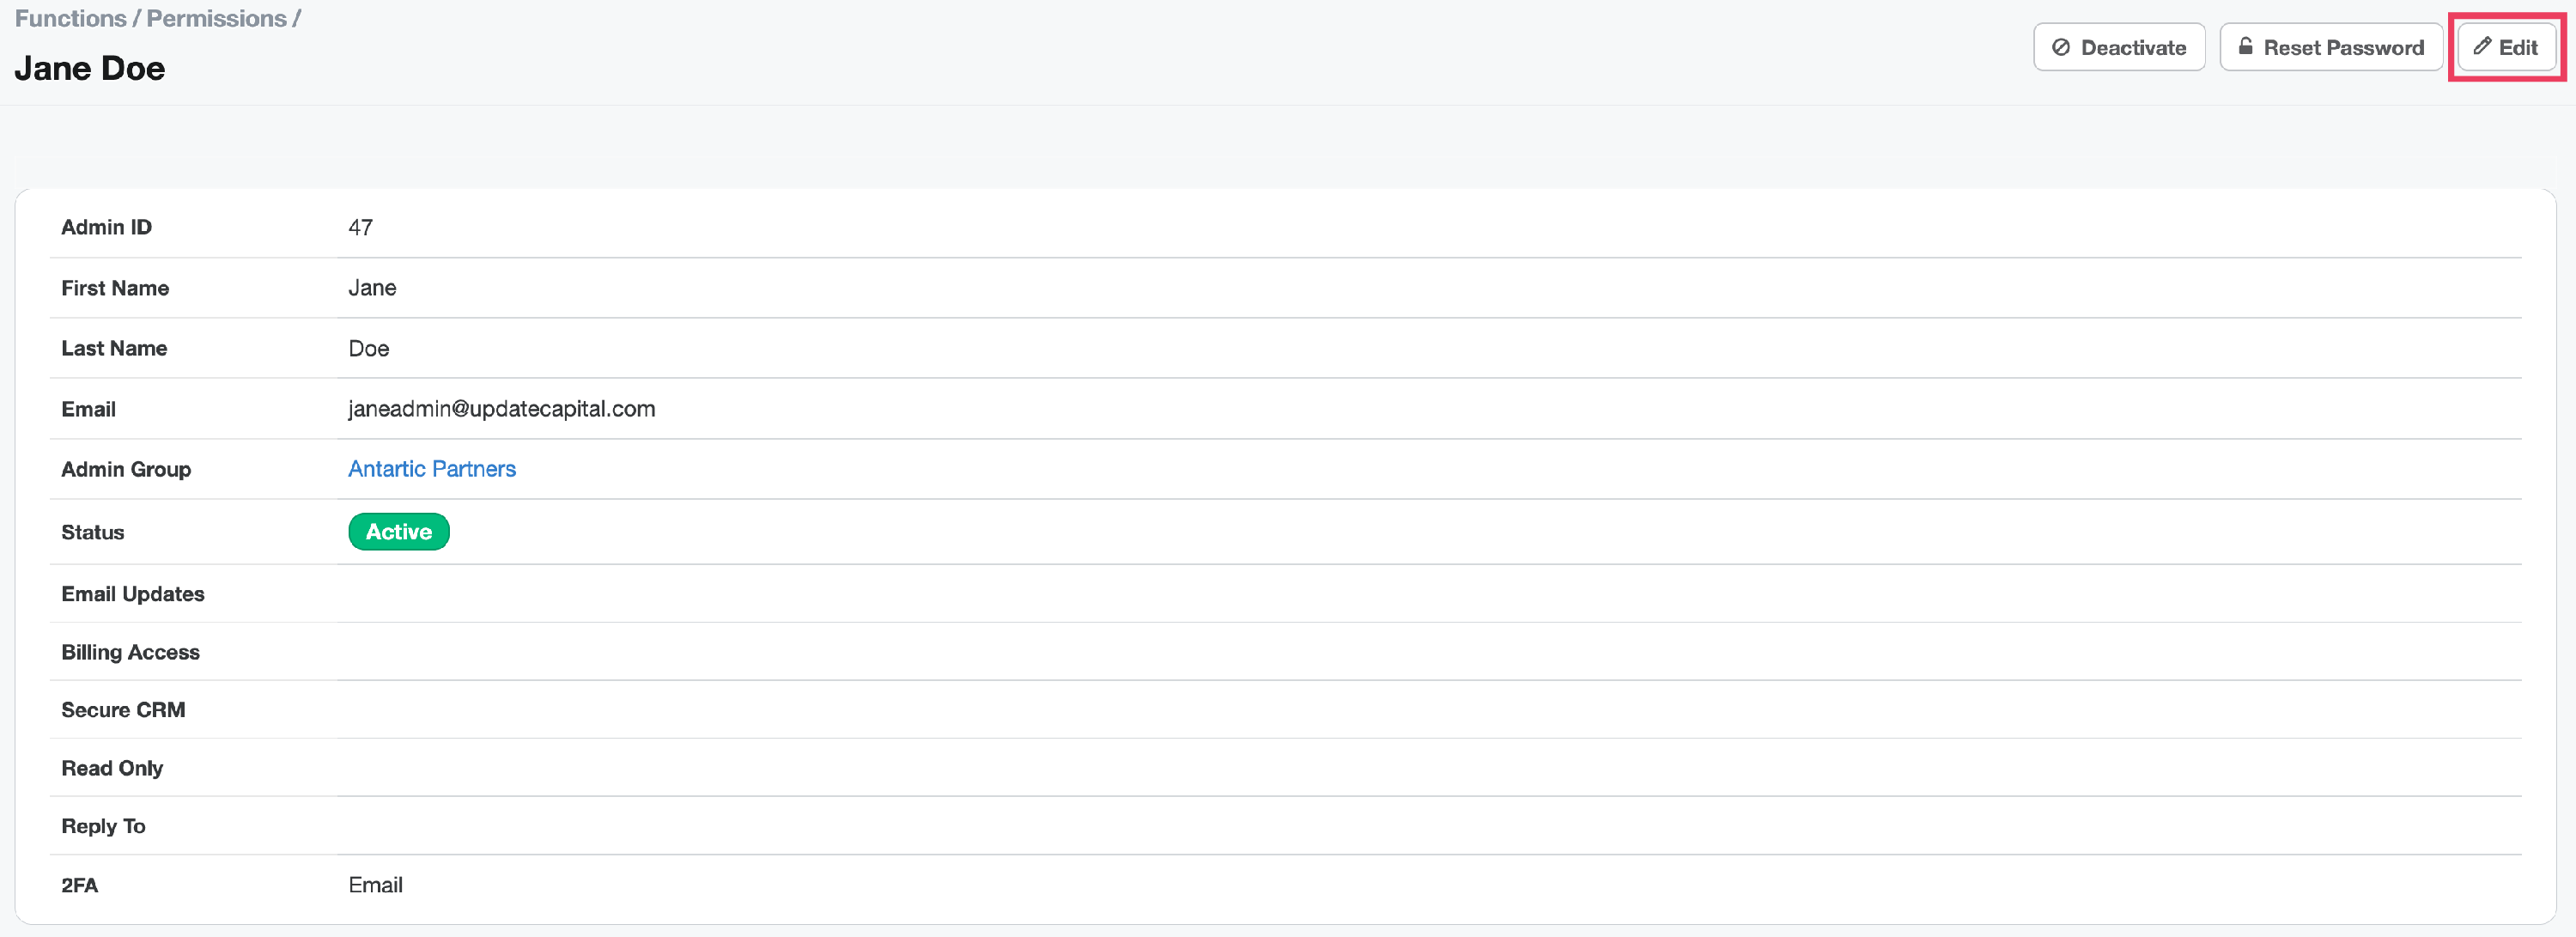
- Click Save.


NOTE: Selecting the Read only checkbox means the admin will not be able to make any changes or add or delete content.
Edit Admin Group
- To edit a user created Admin group (non default admin group), click the Admin Group name in the table on the Admin Groups tab. Here there are two buttons available:
- Deactivate - to deactivate the group, all admins in the group must first be deactivated. *Note: Once a group is deactivated, it can be Activated again.
- Edit - to modify the group name and which funds the group can access.

- Admins can opt to rename the Admin Group and use the Fund menu to modify which funds the Admin Group can access. Click Save.
