
Functions: Permissions - Transfer Out
When an investor transfers out of a fund, Sensr Portal allows admins to set and track the Transfer Out Date. When used, this feature enables investors to continue to view historical fund-level documents, while removing access to future fund-level documents, all without the need to manually update permissions. The Transfer Out feature can be applied to a specific investor-contact assignment or to all of them to accommodate different use cases.
What happens after the Transfer Out Date?
Contact will have access to:
- Investor-level and fund-level documents posted with an Assigned Date before the Transfer Out Date.
- Investor-level documents posted with an Assigned Date after the Transfer Out Date (e.g., tax document posted after the investor transfer out date).
- Fund updates published before the Transfer Out Date.
Contact will not have access to:
- Fund-level documents posted with an Assigned Date after the Transfer Out Date.
- Emails and fund updates sent via the Email Wizard after the Transfer Out Date, unless the admin explicitly opted to include transferred out investors when sending out the communication.
- Newsletters and fund updates sent via the the Newsletter Wizard after the Transfer Out Date.
IMPORTANT: transfer out only removes access to fund-level documents posted after the transfer out date. The investor can still view investor-level documents posted after the transfer out date (e.g., tax statements).
IMPORTANT: An investor is considered as fully transferred once all of their contacts have been set as transferred out. If the transfer out feature was applied only to a specific investor-contact assignment, the investor isn't fully transferred out, and the restrictions outlined in this article will apply only to this specific contact.
Set Transfer Out Date for Investors in a Fund
- Navigate to Functions > Permissions > Contacts tab. Use the available filter to locate the related fund and click Edit Fund.

-
In the Transfer Out Date column, select the desired date. Click Save.
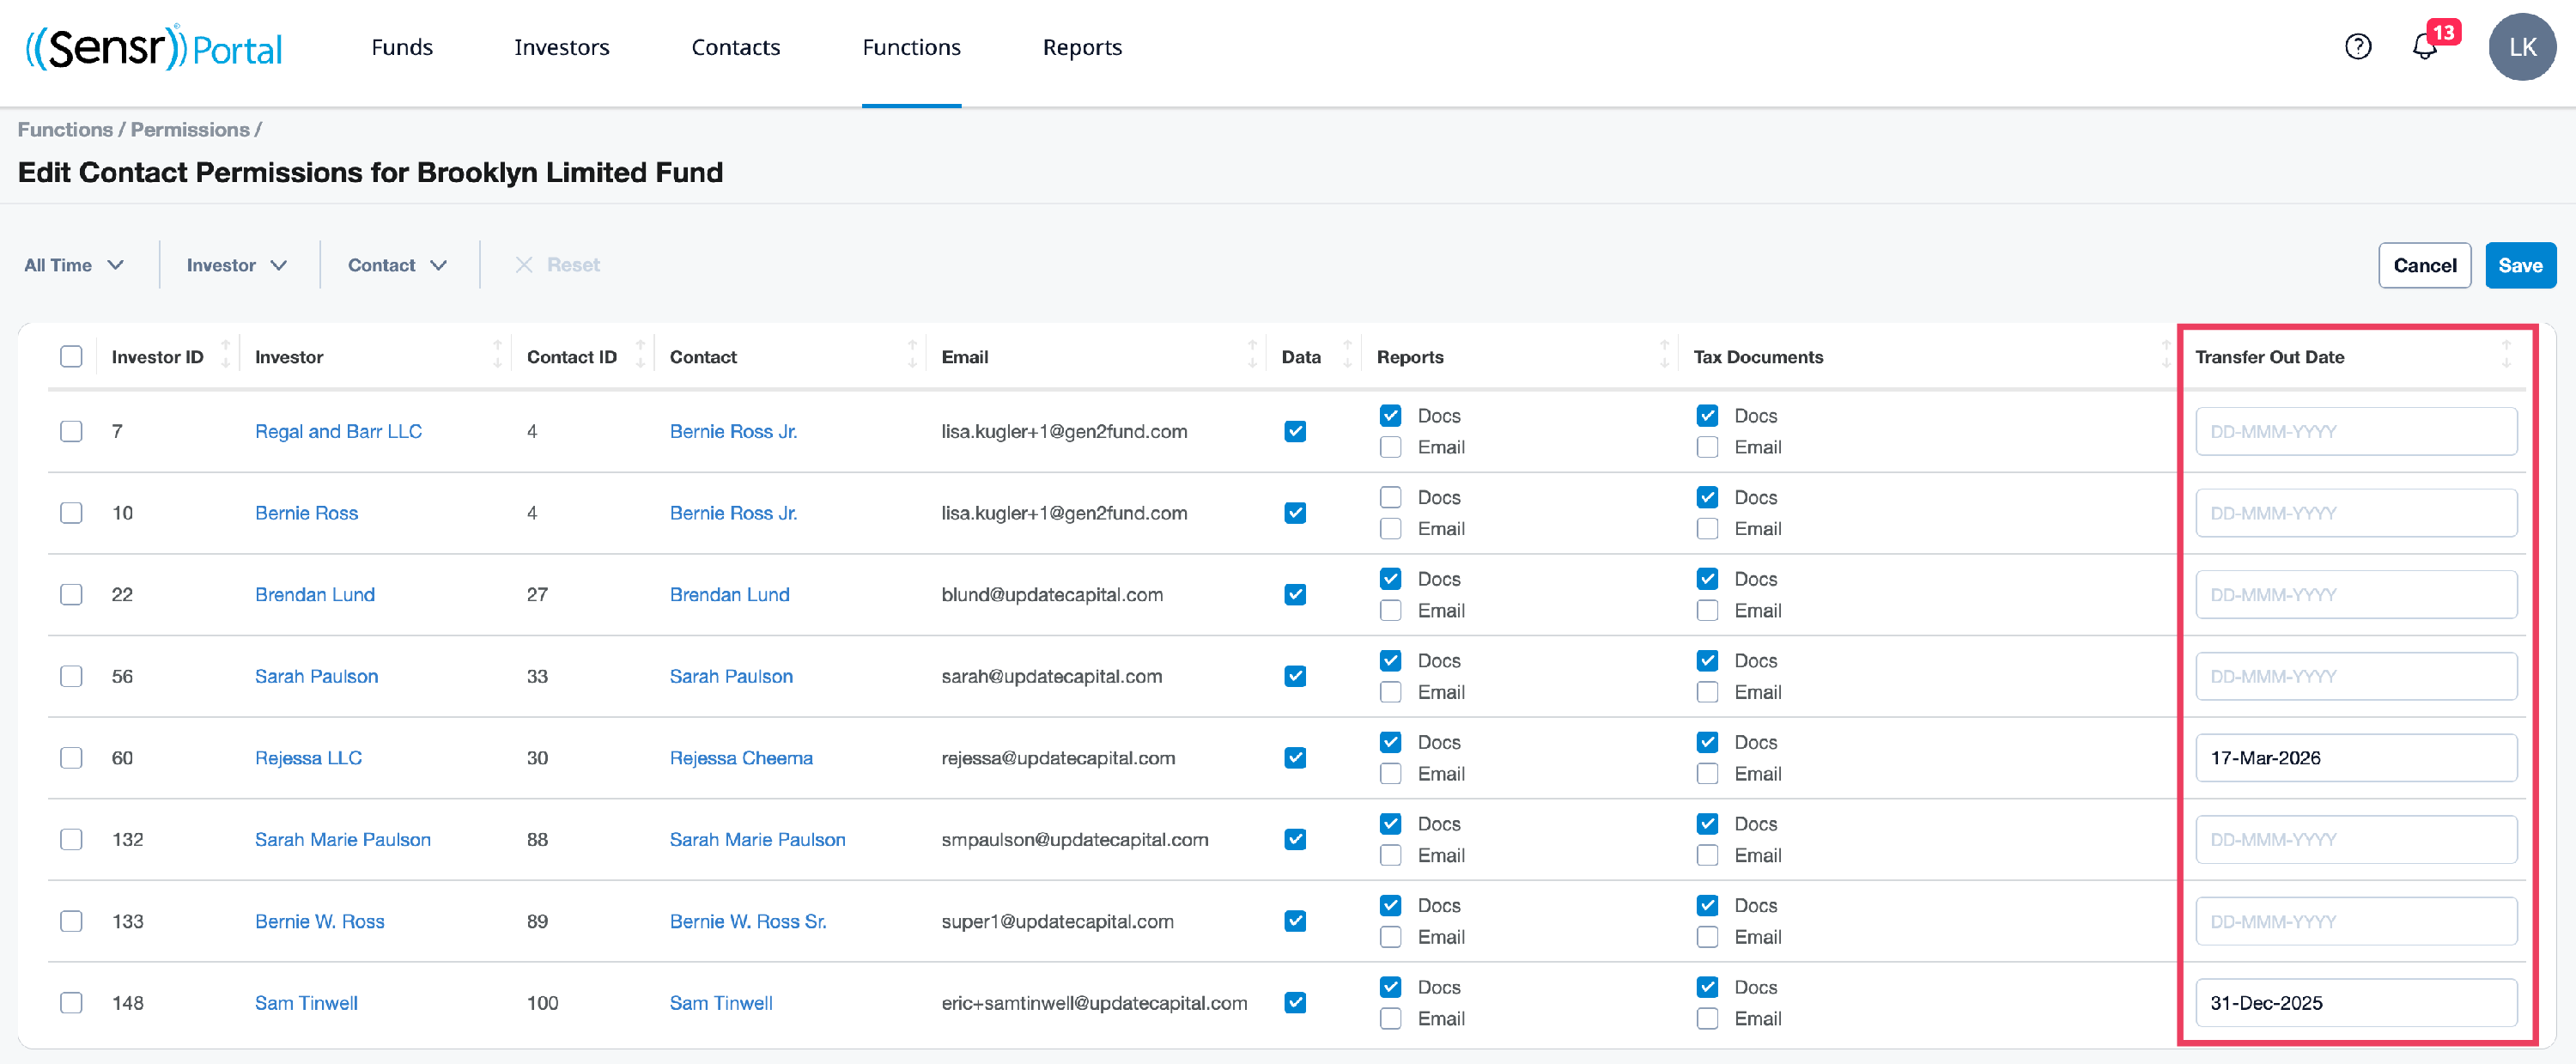
Set Transfer Out Date for a specific contact across multiple funds
- Use the Contact available filter to select a single contact and then click Edit Contact to modify multiple fund permissions at once.

- On the Edit Contact Permissions page, enter the effective date in the Transfer Out Date column. Click Save.

Bulk Manage Transfer Out Date Set
-
To set Transfer out dates in bulk, click Download XLSX.
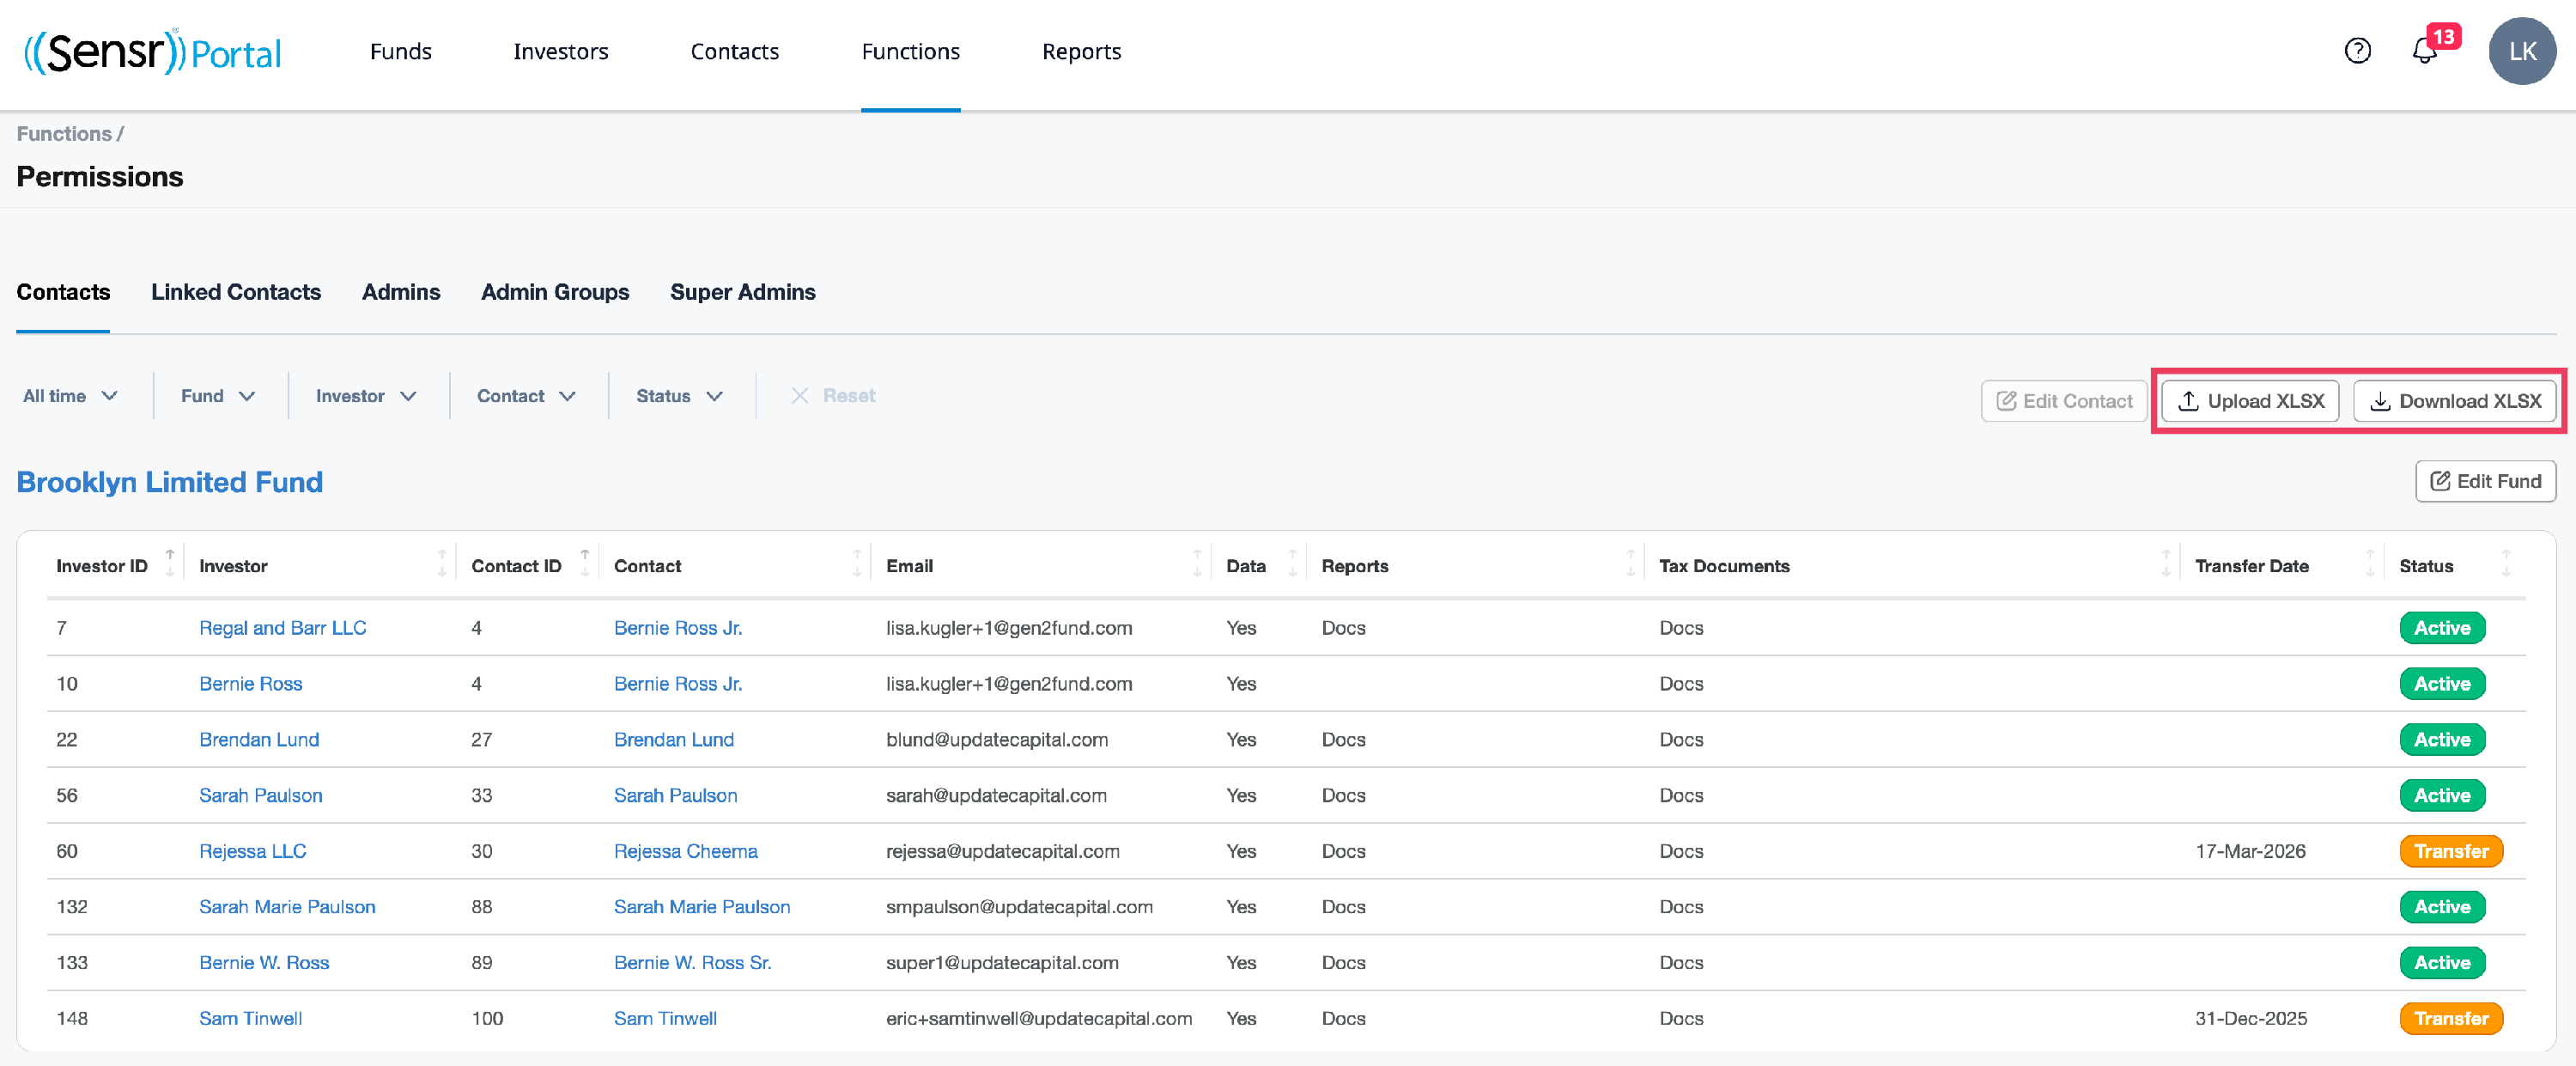
- Update the file accordingly. Be sure to save before moving on to the next step.
- Next, click Upload XLSX to upload the file.
IMPORTANT: All transfer out dates must be the same across each line item (e.g., folder) for the same contact in the file to ensure a successful upload.